We love to travel, and we also love coffee. Whilst these two often go hand in hand, there are occasions when a good tasting cup of coffee is difficult to find, not available, or is really expensive.
For example, you might be staying in a hotel or B&B that only offers instant coffee or makes bad tasting coffee. You might be out camping, hiking, or staying in more remote locations where there are no places to get coffee.
Maybe you like to take afternoon breaks on your road trip, safari, or hike and be able to have a good cup of coffee no matter where you are. Or maybe you’re staying in a city where the prices of a cup of coffee at local coffee shops are high and you’d like to make your own to save money.
One of the options we’ve tried to solve these problems are the travel coffee makers from AeroPress. These aim to solve the issue of making great coffee with minimal fuss, wherever you are. You can also save money by making your own coffee, and the AeroPress system is relatively inexpensive compared to many other options.
In this AeroPress review, we’re going to look at the two AeroPress products we’ve personally used for making coffee on the go to help you decide if these are right for you. These are the original AeroPress, and the AeroPress Go.
Both of these products are primarily designed to make a single cup of great coffee with minimal fuss.
This review will look at using the products both at home and on the road, because the best tool is one you can use everywhere.
This guide specifically focuses on AeroPress products. We also have a guide to portable coffee makers here, which covers a range of options, from battery powered espresso makers to simple drip filters. So if you are looking for more options, that’s also worth a read.
Now, let’s get into our AeroPress review, which will cover their two main coffee making products. I’ll start by answering some popular questions about AeroPress.
What is AeroPress?
AeroPress is a US based company who manufactures products for making coffee. The company was founded by Adam Adler, an American inventor who also invented the Aerobie flying disc.
He invented the AeroPress in 2004 because he wanted a single-serve coffee maker that gave him greater control over the coffee making process.
He also aimed to create a coffee with reduced acidity and bitterness compared to methods like drip coffee or espresso. The AeroPress has been very popular with coffee lovers since it launched and has developed a cult following.
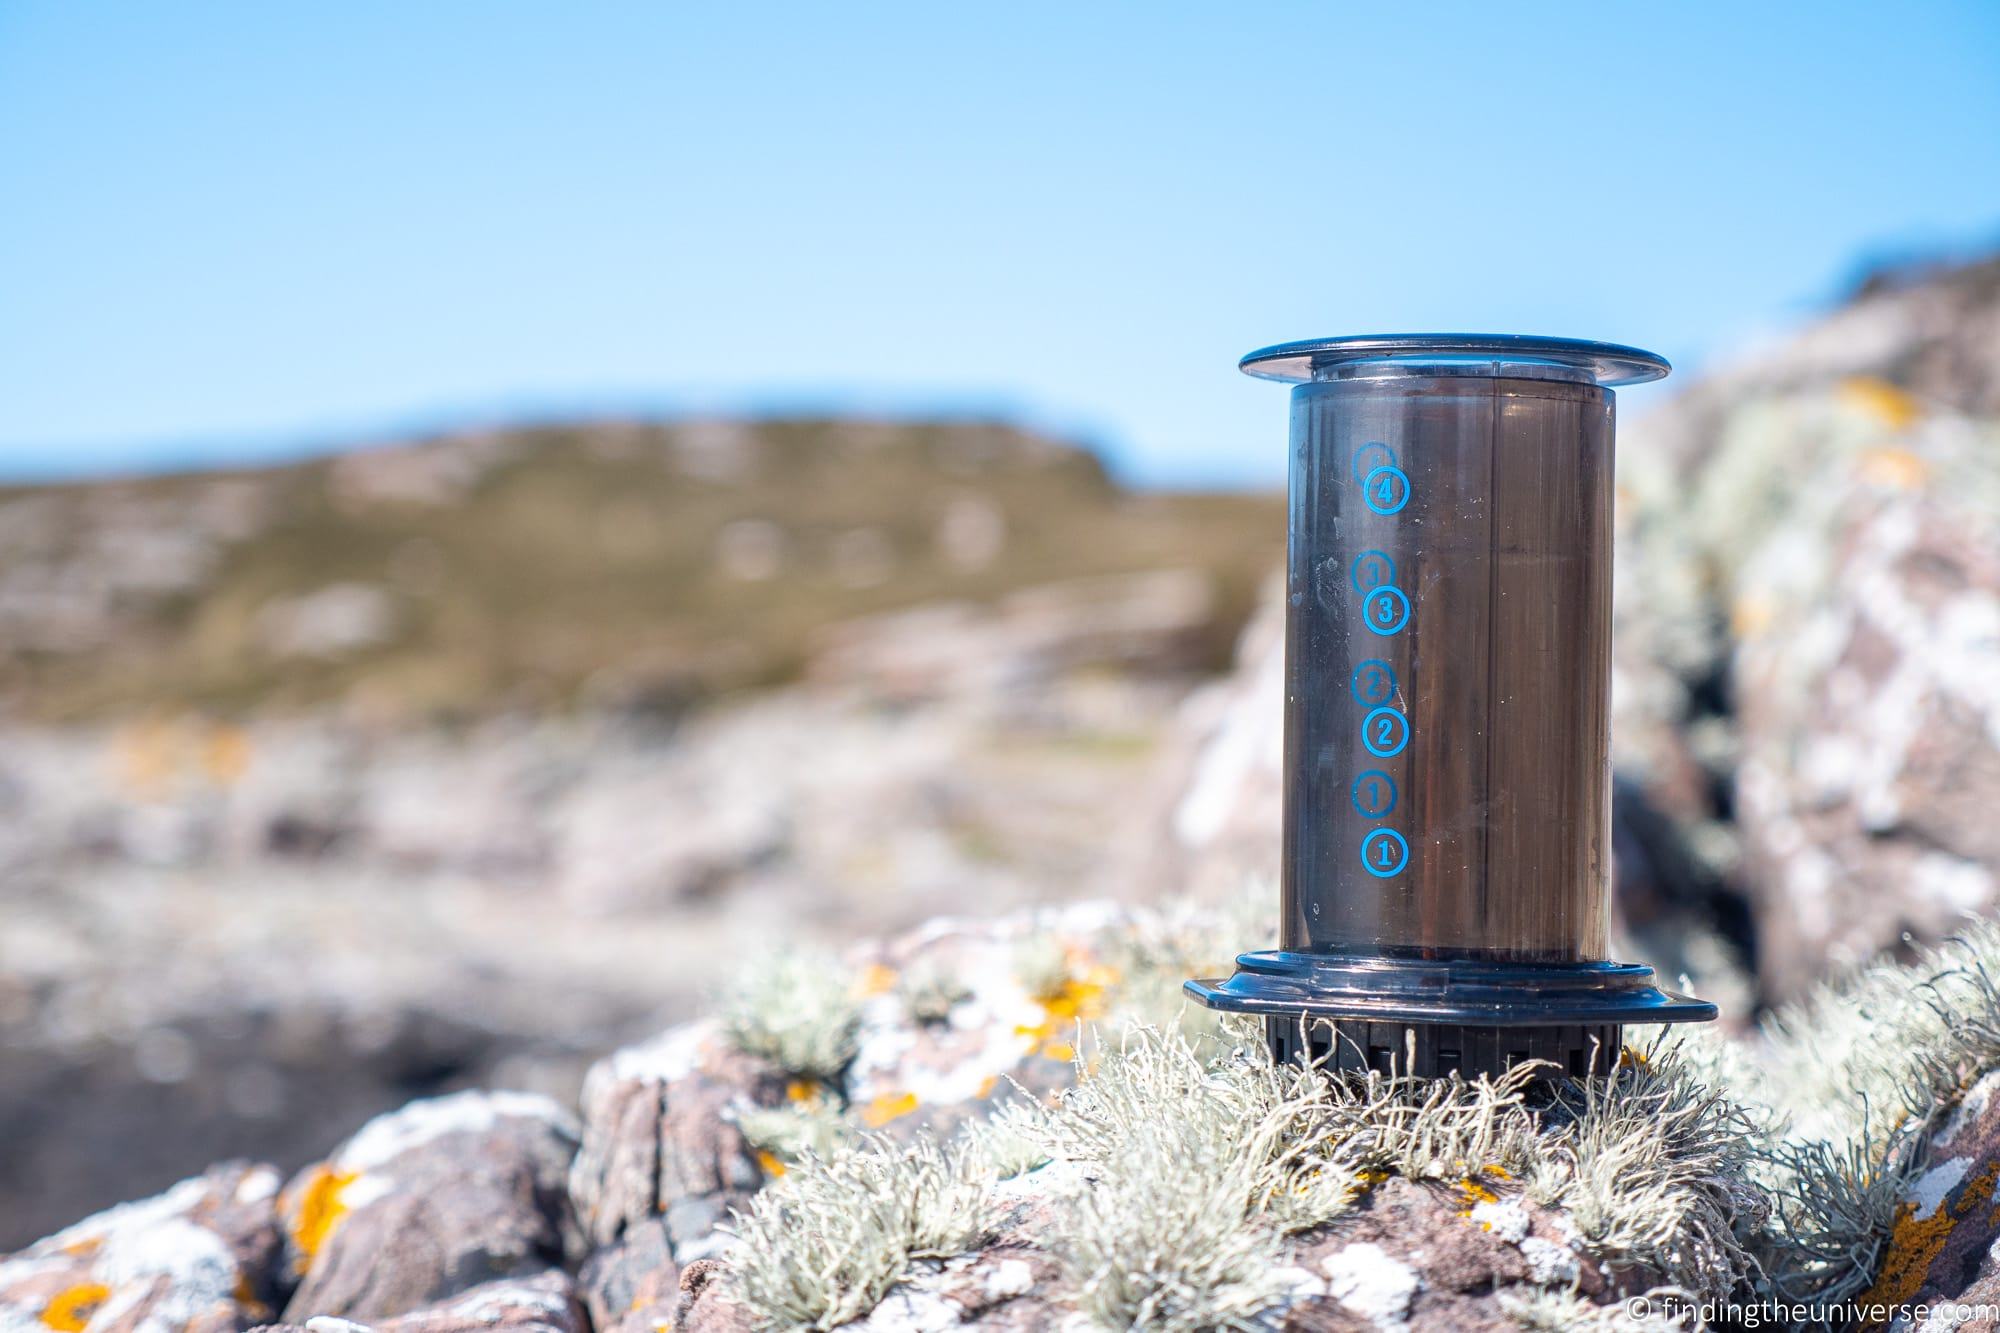
What Products does AeroPress make?
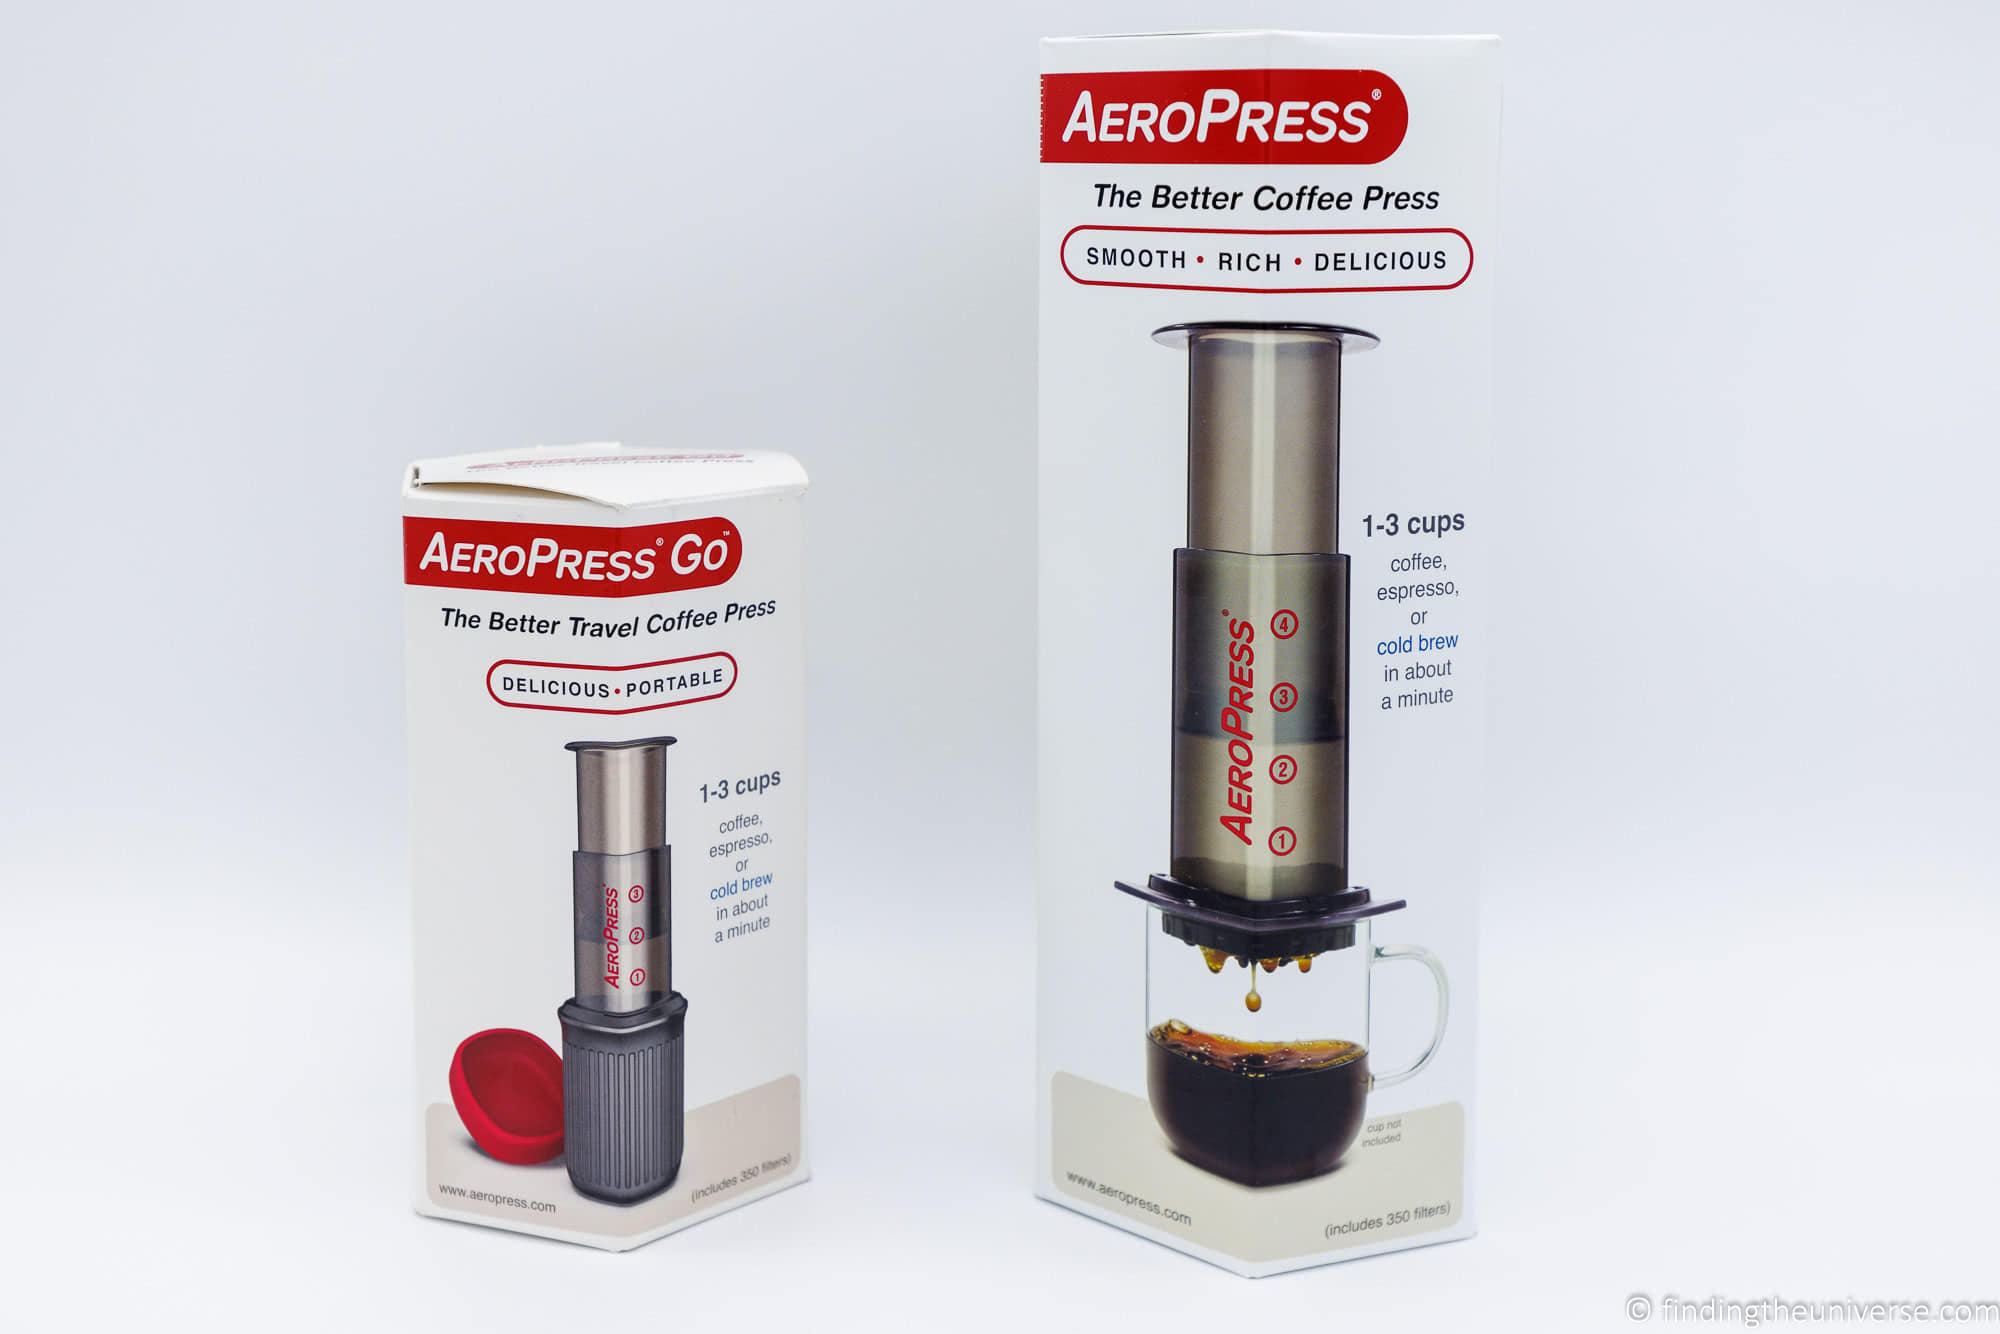
AeroPress currently makes two main products for brewing coffee.
First there is the original AeroPress coffee maker, launched in 2005.
Second, there is the AeroPress Go coffee maker, launched in 2019, which is aimed more at the travel market.
Both produce coffee in the same way, the main difference is that the AeroPress Go is primarily designed as a travel solution. However, both can be used at home and for travel. We’ll go over the main differences between these products in our review.
Where are AeroPress products made?
AeroPress designs and manufactures all of their products in the USA. So if you are looking for a coffee maker made in the USA, AeroPress is an excellent option.
AeroPress products are sold globally via Amazon.
What Kind of Coffee do AeroPress products make?
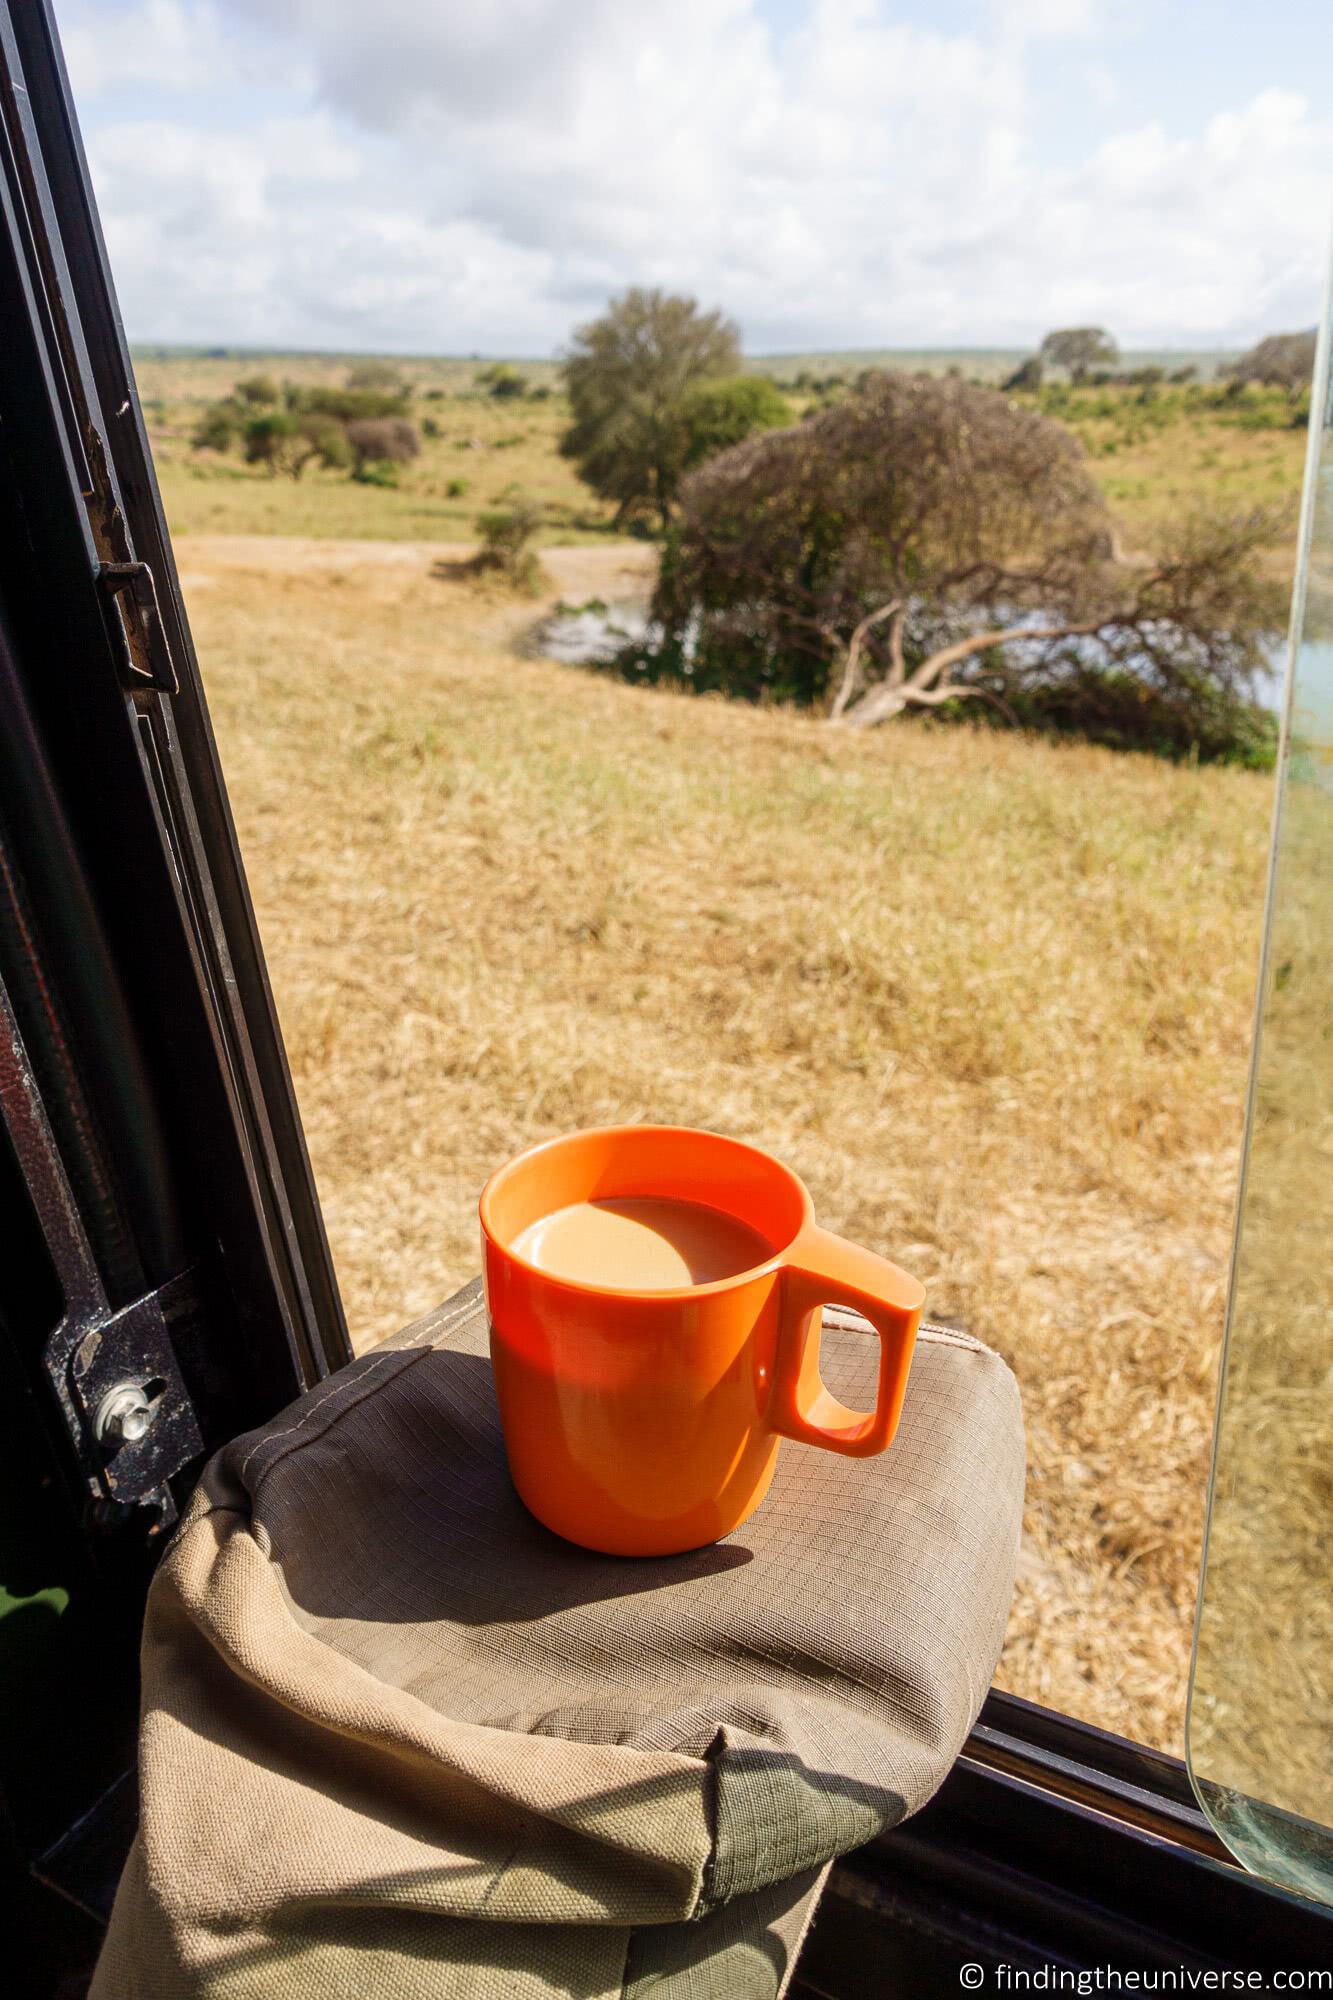
An AeroPress can be used to make different styles of coffee, including drip coffee, American coffee, espresso style coffee, and cold brew. It can also be used to make a number of coffee drinks such as lattes and cappuccinos.
AeroPress products actually make a unique style of coffee, which is usually described as a hybrid between espresso coffee and drip coffee. It has a stronger flavor than drip or filter coffee, and in this regard is more similar to an espresso.
That said, you don’t get a true espresso with a crema as you would from a high-pressure espresso machine. If you truly want espresso on the go, then you might want to take a look at the Wacaco Nanopresso instead.
AeroPress coffee has lower acidity than true espresso, making it a great option for many coffee drinkers as it can be easier on the stomach than espresso. It can be a good option for people who love drip coffee, French press coffee, and espresso.
Because AeroPress coffee is similar to espresso, you can use it to make a number of different types of coffee. Espresso is used as the basis for many coffee drinks, so your AeroPress can be used to make Americanos (add hot water) and lattes (add steamed milk), as well as any other coffee drinks that uses espresso as the base.
You can also make cold brew coffee using an AeroPress, a process which only takes a couple of minutes. That cold brewing process is outlined here.
Being able to brew cold brew style coffee in an AeroPress is actually awesome for travel as you might not always have access to hot water. However, you can still make a decent cold brew coffee without the prolonged brewing time that is normally associated with cold brew coffee.
How Does the AeroPress Work?
The AeroPress brewing process involves the user pushing water through a filter, so this is a pressurized extraction like an espresso, although at a lower pressure. Espresso makers have to produce around 9 bars of pressure to qualify as espresso machines, whilst an AeroPress is around 0.5 bars of pressure.
This is still more than a drip filter which just uses gravity, meaning that drip coffee has less flavor extracted from the beans.
Brewing coffee with an AeroPress is faster than drip coffee as you force the water through the press. Making a cup of coffee with an AeroPress takes around thirty seconds, assuming you have boiling water However, it is worth noting that the AeroPress is primarily designed as a single serve coffee maker, so for making larger batches of coffee it is not quite as convenient as a drip machine.
It should be noted that people have come up with lots of different brewing methods and tips for how to make coffee using the AeroPress. These include using the inverted brewing method, blooming the coffee, wetting the filters, pre-heating the chamber, etc.
However, most of these take more time and the majority make little difference in taste to the final cup of coffee according to coffee experts like James Hoffman who made this excellent video series on the AeroPress.
We’d recommend starting with the instructions as provided by AeroPress as these have been tested and designed to work well. Then once you’ve got those down, you can try some alternative methods if you’d like to experiment.
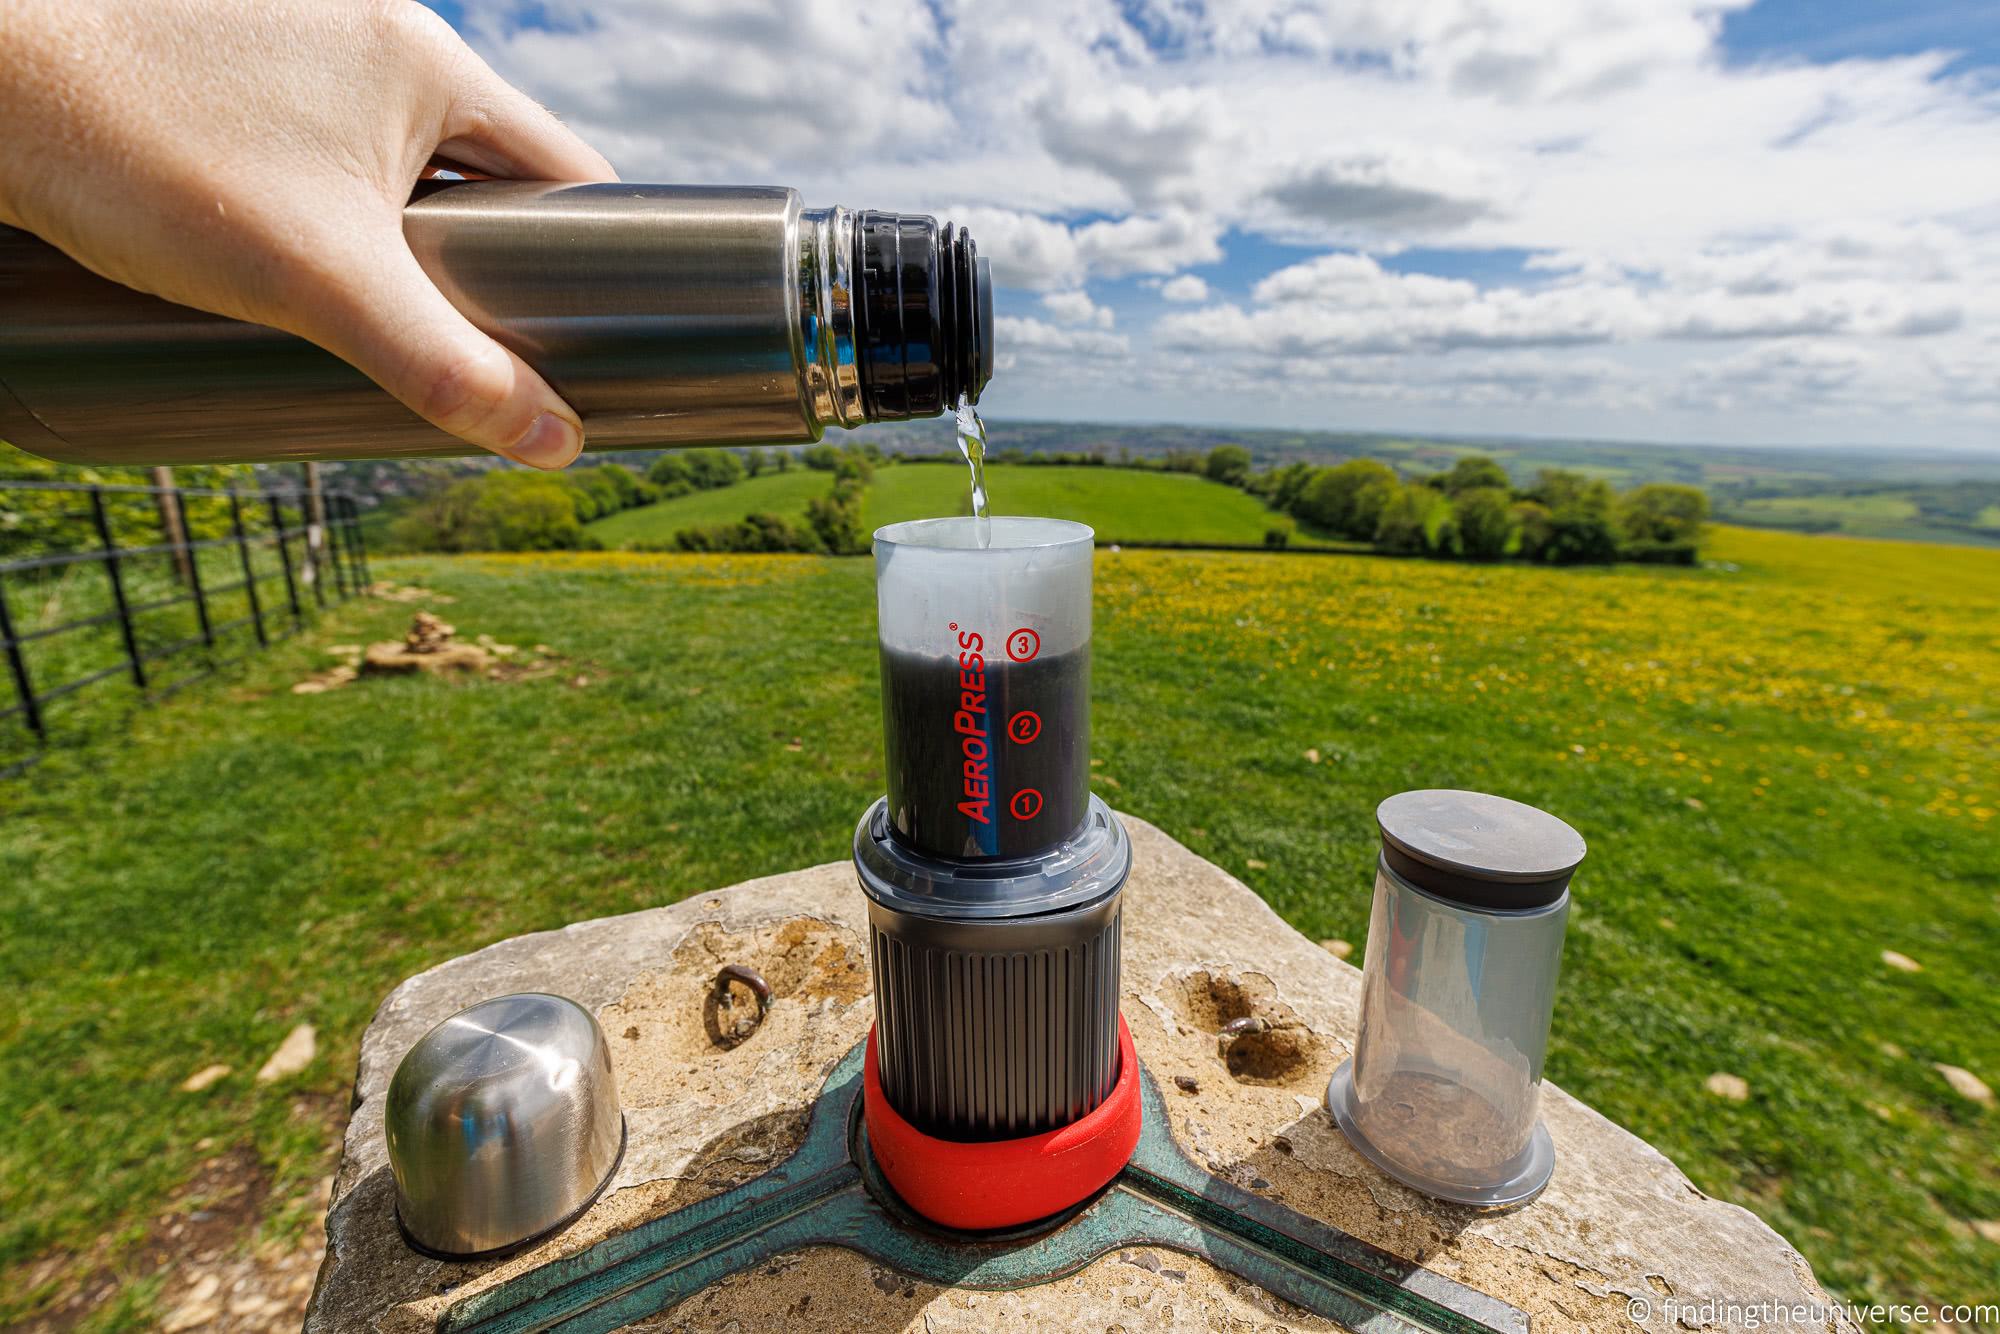
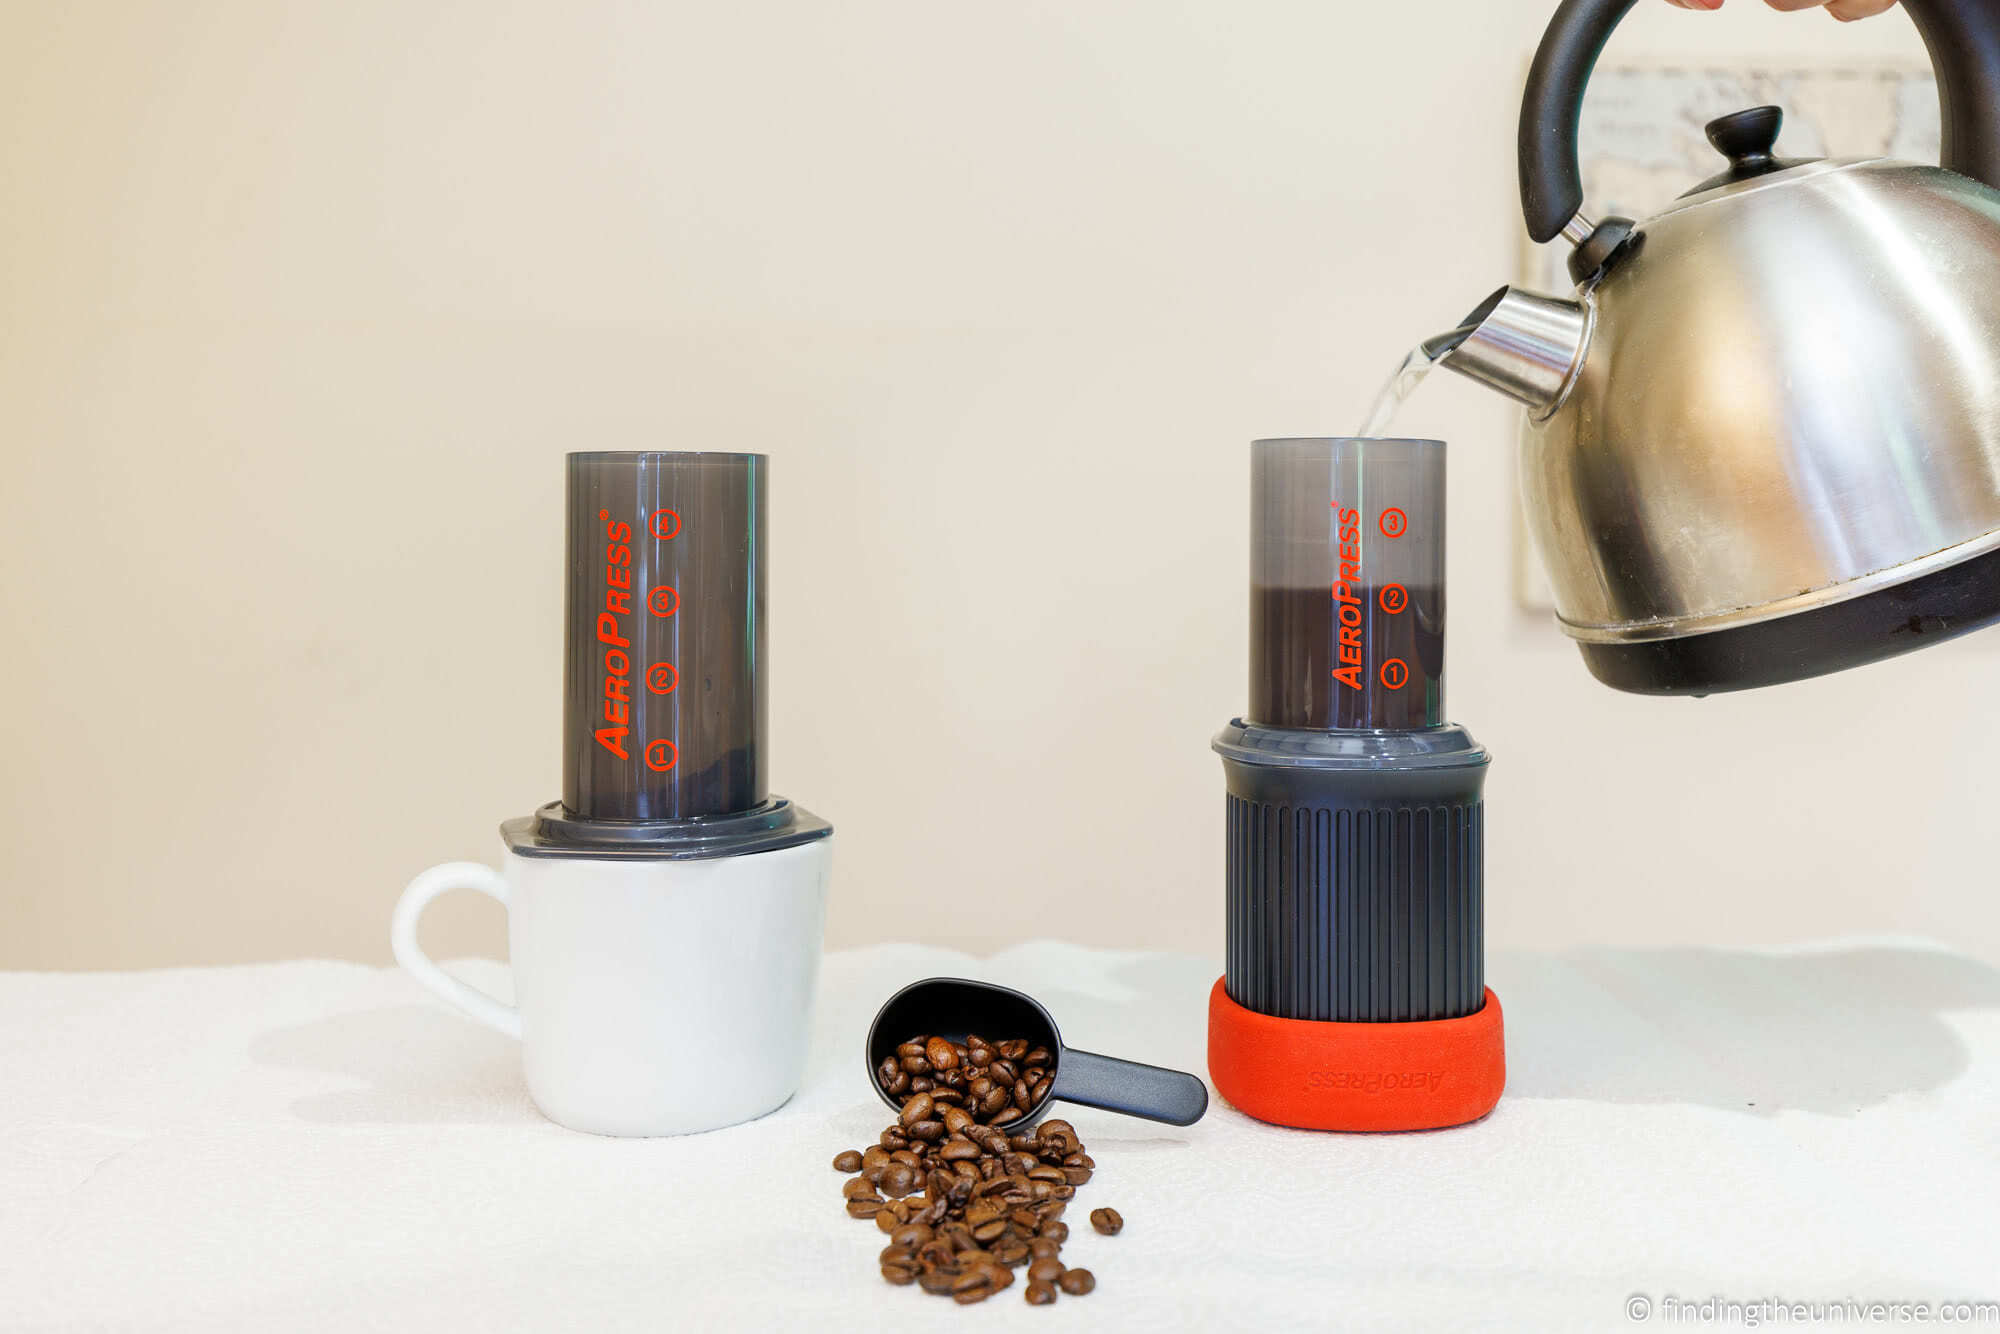
Brewing hot coffee using the AeroPress or AeroPress Go is simple. You need finely ground coffee (espresso or fine drip grind ideally), water at 175 F / 80 C, and a sturdy mug that the AeroPress fits onto (or you can use the supplied mug with the AeroPress Go).
For cold brew coffee, the process is almost the same but you use room temperature water and the stir time is longer. Instructions for this are provided with the product as well as online.
To brew with the AeroPress or AeroPress Go , the instructions as provided are as follows.
- Remove the plunger from the chamber
- Put a filter into the filter cap. You can use the supplied paper filters, or you can use a third-party metal filter
- Securely twist the filter cap onto the chamber
- Place the chamber onto the mug and add coffee grounds. AeroPress recommends a scoop of ground coffee per serving for espresso-style coffee. You can adjust depending on your taste preferences for stronger or weaker coffee.
- Shake the chamber gently to level the coffee
- Add the water up to the mark on the chamber, depending on how many servings of coffee you are brewing. AeroPress suggest that for 1 serving and 1 scoop, fill to the “1” line; however, as with the coffee amount you can adjust to taste.
- For hot brew coffee, stir the hot water and coffee grounds for 10 seconds using the stirrer. For cold brew coffee, stir for 1 minute.
- Once stirred, insert the plunger silicone side down and gently push down until the plunger reaches the grounds. This is the part where you want to be particularly careful as obviously you are dealing with very hot water, and parts of the AeroPress might get quite hot.
- The coffee is now brewed! You can remove the chamber / plunger from your mug.
- Remove the filter cap (note it might be hot). To dispose of the grounds and filter, simply push the plunger all the way through. You’ll want to do this over your compost or garbage bag as it will pop out in aneat disc. Rinse the seal.
- If you are making espresso, you are now done! Otherwise, you can use the espresso as the base for your other drinks.
I should add that while these are a good starting point, it’s worth noting that one of the nice things about the AeroPress system is that you can easily adjust a number of variables to suit your tastes.
Again, you can adjust many variables in the above process, such as the coffee bean grind, steep time, water temperature, and the ratio of water to coffee to come up with your perfect cup.
Personally, I have found that using 1 scoop of ground coffee, a chamber of water up to the top number and a 2 minute steep time works well to create a nice cup of coffee for one person.
How Much Coffee Does an AeroPress Make?
The AeroPress original can make up to 10 oz (295 ml) of coffee in a single press. The AeroPress Go can make up to 8 oz (236 ml) of coffee.
It is important to remember that the AeroPress system was primarily designed as a single serve coffee maker. Making one cup usually takes around thirty seconds assuming you have boiling water, although you can of course adjust how long the coffee steeps to your taste preferences, anywhere from 30 seconds to four minutes works fine.
Because the system is flexible in terms of how much coffee you can add, it is also possible to make more than a single serving of coffee from one press. You can use two or three scoops of coffee, steep it for longer, and then mix the resulting stronger brew with hot water to make two or three cups.
AeroPress estimates that their system is still faster than drip coffee for multiple people, even if you have to do two of three presses to make a larger amount. It might not be quite as convenient as a drip coffee maker, but it will work and likely taste better to boot.

AeroPress & AeroPress Go Overview
As noted above, AeroPress make two products for brewing coffee, the original AeroPress and the AeroPress Go. Both use the same process for making the coffee, the differences are more around the accessories, portability, and volume of coffee produced.
First, it’s important to realise that both products are very portable. I have used both the AeroPress and the AeroPress Go when traveling, and they both work well to make coffee on the go. They are also both made in the United States and retail for around the same price.
There are, however, some key differences. Let’s look at what you get in each package and the main features.
AeroPress Original
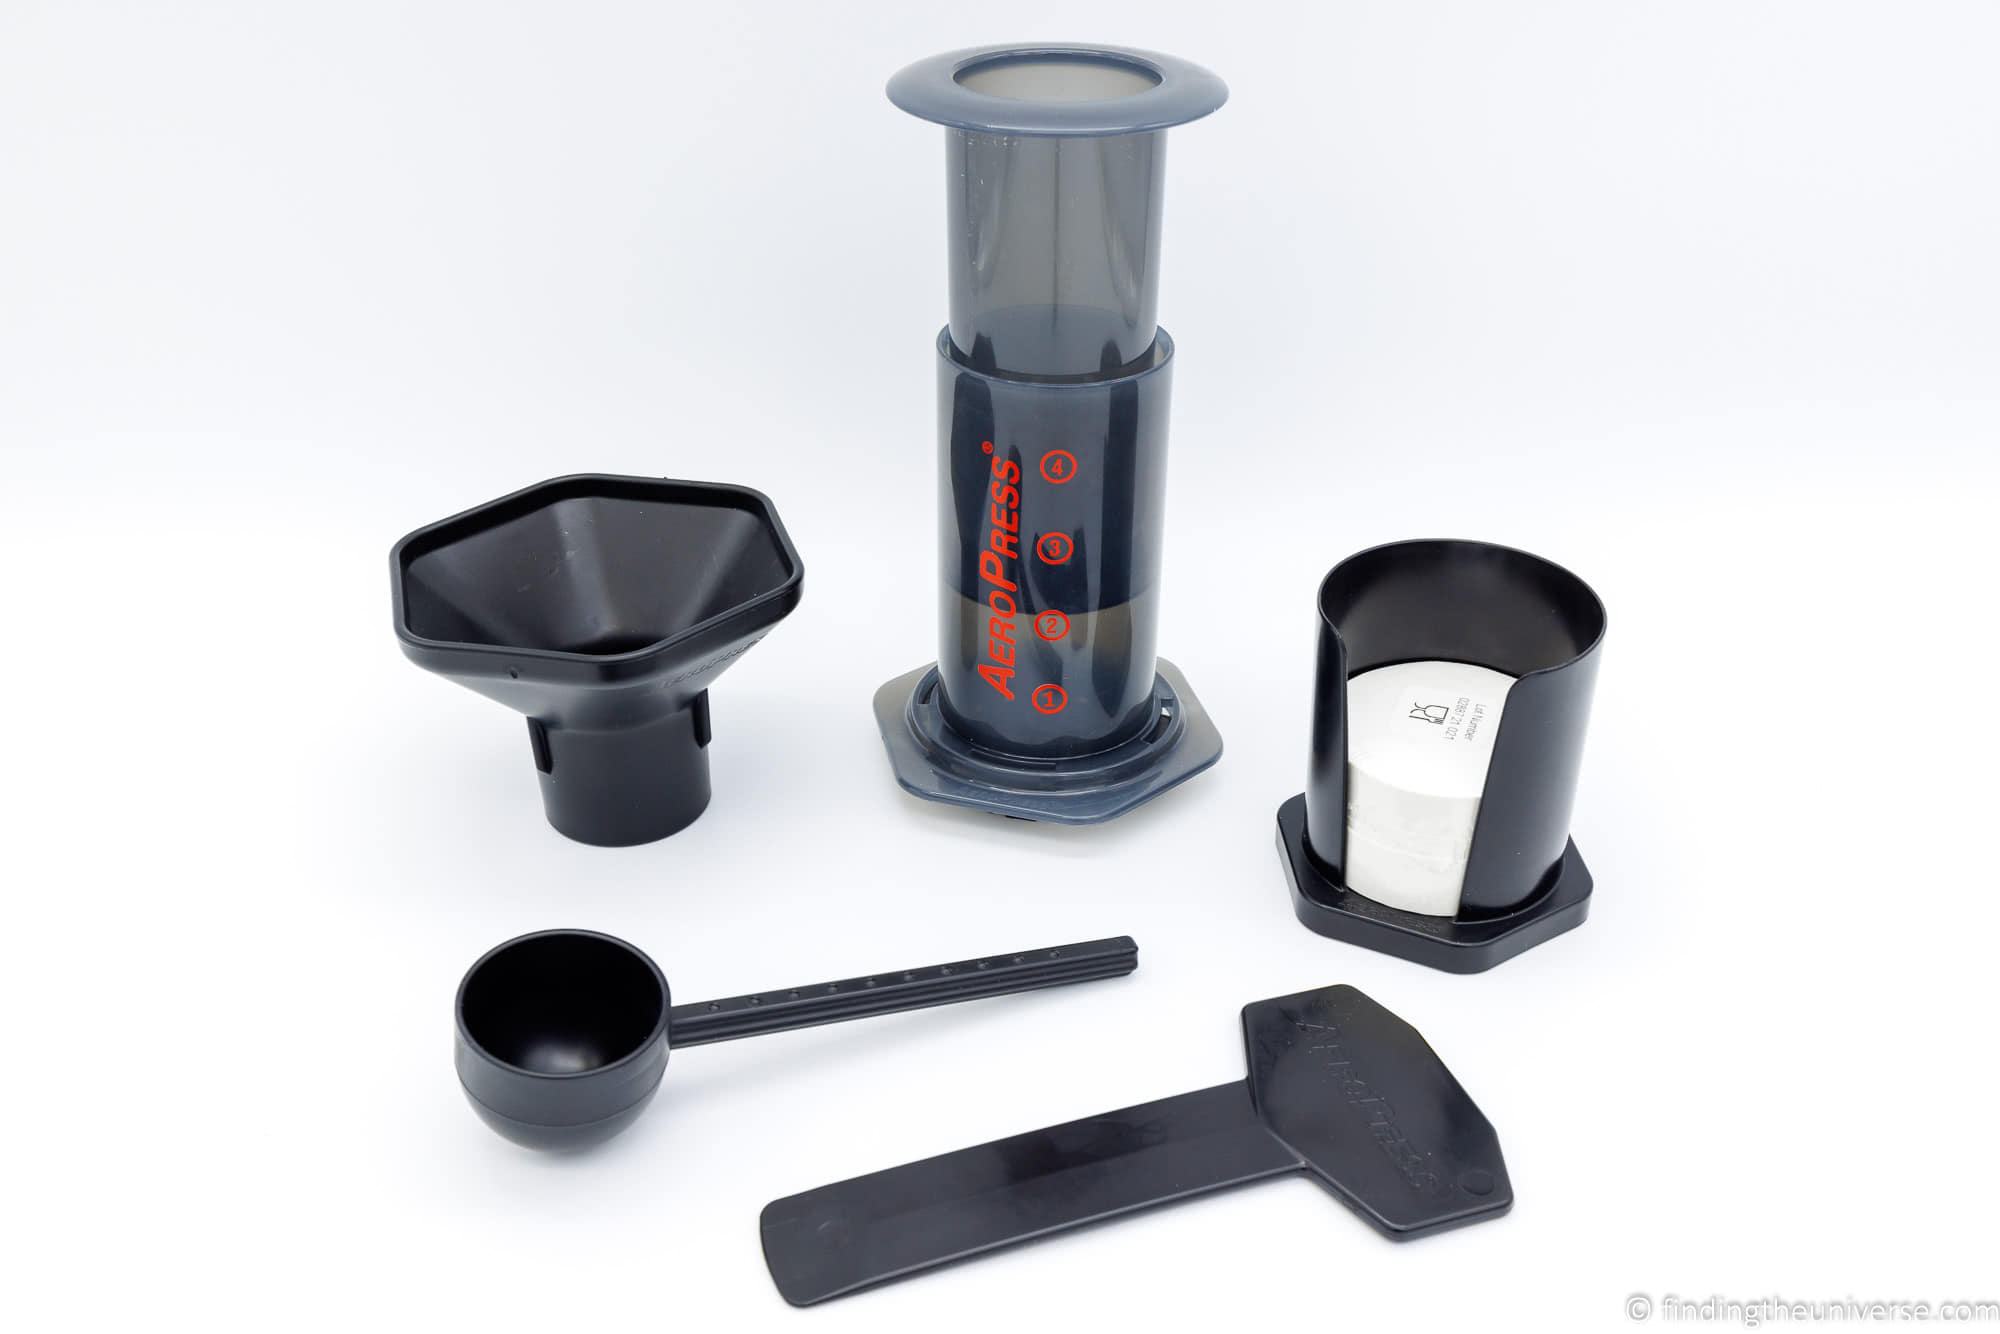
The AeroPress original comes with:
- AeroPress original chamber and plunger
- 350 paper microfilters, filter holder (holds up to 500 filters), & filter cap
- Funnel, stirrer, and scoop
- Optional tote bag for travel
The total weight of the AeroPress Original and accessories when packed into the tote bag is 13 oz (368 g).
In terms of coffee production, one brew will produce 10oz of coffee. It is designed to brew the coffee directly into a mug or coffee cup.
The AeroPress original supports mugs with a top inner diameter from 3.75 inches to 2.75 inches (95mm – 67mm). However, you can also use the funnel attachment which slots neatly into the base of the plunger for brewing into a smaller mug.
This use of the funnel isn’t mentioned in the instructions, but is definitely a handy feature. Note this isn’t officially supported by AeroPress, and they recommend that if you use the funnel in this way you ensure you use a sturdy mug and take care to ensure everything is firmly held to avoid any spills.
AeroPress Go
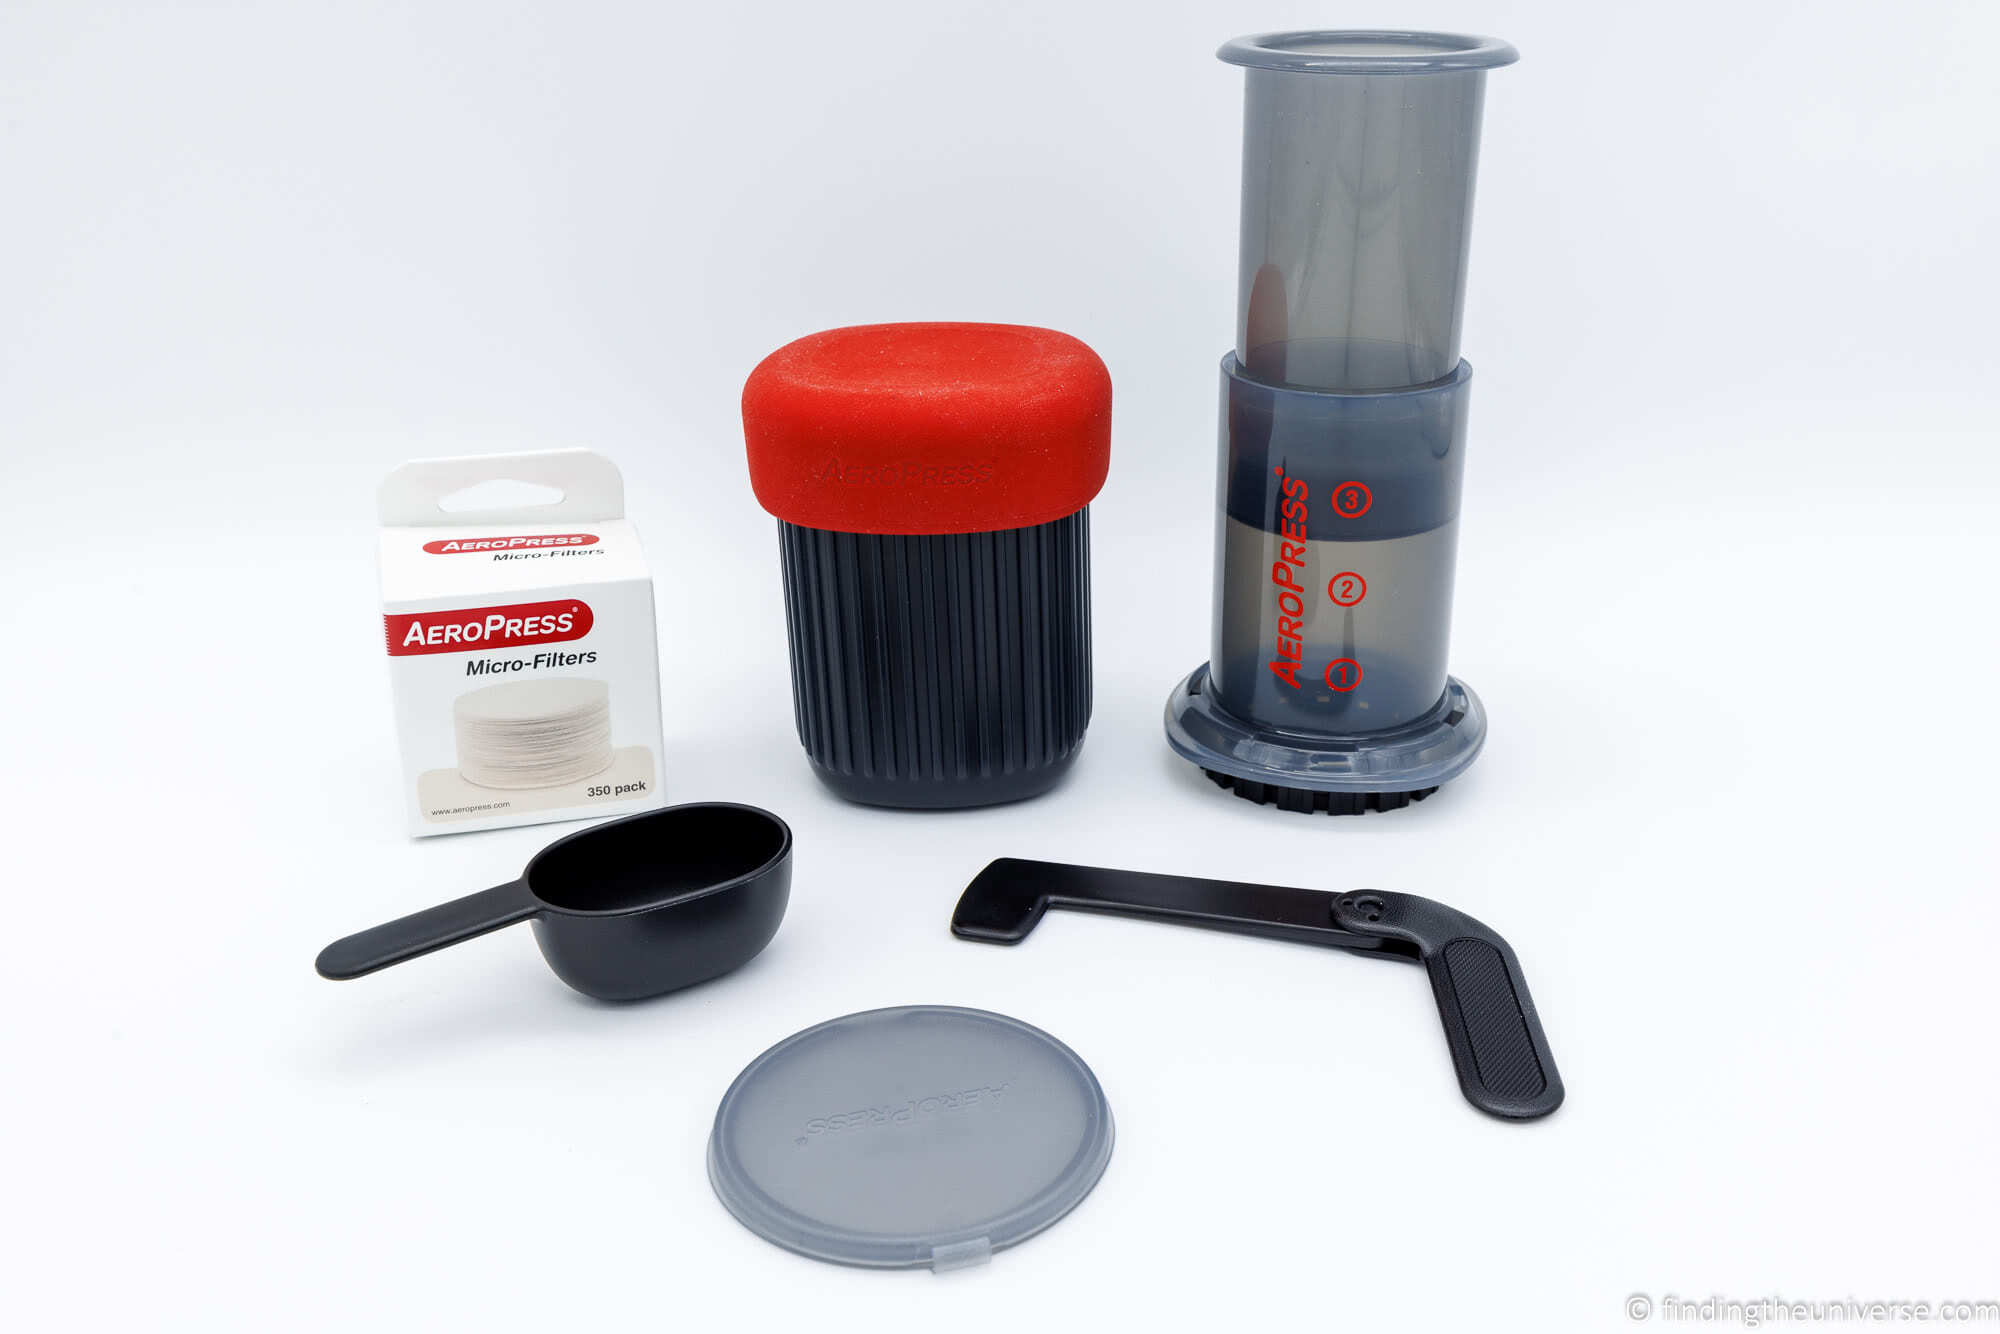
The AeroPress Go comes with:
- AeroPress Go chamber & plunger
- 15 oz Mug with lid which serves as storage for everything when traveling
- 350 paper microfilters, filter holder for 20 filters, & filter cap
- Folding stirrer and redesigned scoop
The total weight of the AeroPress Go and accessories when packed into the mug is 11.4 oz (323 g).
With the AeroPress Go, you lose the funnel accessory, but you gain a mug with a lid which doubles as a storage container.
In terms of coffee production, one brew will produce 8oz of coffee, 2oz less than the AeroPress original. It is also designed to brew the coffee directly into a mug.
The AeroPress Go supports mugs with a top inner diameter from 3.25 inches to 2.75 inches (82mm – 67mm). This is a slightly smaller maximum diameter than the original AeroPress.
AeroPress Review
The original AeroPress is the most well-known product, and the one which started the AeroPress revolution. It has gone through various design changes over the years since the original product launch in 2005, but the overall concept remains the same.
Some of these changes were more major, such as the switch from BPA to BPA-free products in 2009. However, most of the changes have been largely cosmetic. The version I currently have is the 2019 version 8, which adds red lettering to the exterior.
I’ve also used the 2010 version 4 model, which has blue lettering, and used a different material for the seal. Now, all the models are made using silicone seals.
The AeroPress original comes in a well-sized box which fits everything securely. The instructions and information detail all the benefits of the AeroPress system and also outline the three-step brewing process.
One thing to note is that the supplied funnel has two uses. It can be used to help pour the beans or water into the chamber, but it can also be used for brewing into smaller mugs. The hexagonal shaped funnel top is exactly fits the filter end of the chamber, so you can brew into smaller cups if you prefer.
The main thing you are probably wondering is whether or not the coffee produced by the AeroPress is actually any good. In my opinion it makes delicious coffee, certainly better than drip coffee or instant coffee.
We have brewed using both the AeroPress original and Go in various scenarios. I have tried it with different coffee beans and different bean grinds, as well as with different water temperatures. I like how you can easily experiment with these different variables quickly and easily to produce different results.
Generally, I like an easy drinking coffee that isn’t too bitter or acidic. I have found that a well ground single scoop of coffee with water below boiling point, such as that from a Thermos flask, works well. I steep it for a couple of minutes before pressing, giving it a gentle swirl before pressing to settle the grounds. This technique gives me one good cup per person.
If I want to brew for more people, I’ll either strengthen the coffee by adding an extra scoop and then adding hot water to the final brew, or make two separate brews. Both work well and honestly it doesn’t take a lot of time to do either method.
In my opinion, the main strengths of the AeroPress are how easy it is to use, how good the coffee it produces is, and how easy it is to clean up. That latter feature is not to be overlooked, making coffee can be a messy process, and the AeroPress is remarkably easy to use and makes no mess. It’s also easily portable, and gives you control over the coffee it produces.
The main disadvantage, especially if you are using it at home, is that it produces a relatively small amount of coffee. This is obviously part of the design, as it is really a single cup coffee brewer.
So if you are used to firing up a drip coffee machine that makes 6 – 12 cups, this won’t be a straight replacement. It’s more for those times you just want a cup of coffee rather than a pot.
Obviously, the AeroPress also doesn’t heat your water, so you will need a source of hot water to brew hot coffee or bring along a flask or thermos with hot water. However, you can still brew cold brew coffee in scenarios where hot water is not easily obtained.
When we’ve traveled with the original AeroPress, we’ve learnt that we definitely don’t need all the accessories. The funnel, scoop, stirrer and filter holder all stay at home – a spoon works just as well as the scoop for rough measurement.
All we really need is the chamber, plunger and filter cap, and enough filters to last (or a metal mesh filter). We also need to remember to bring the right size cup to plunge into.

AeroPress Go Review
The AeroPress Go was launched in 2019, with the goal of creating a more portable coffee making kit. The size difference is obvious from the get-go even when comparing boxes, as the AeroPress Go box is around two-thirds the size of the original.
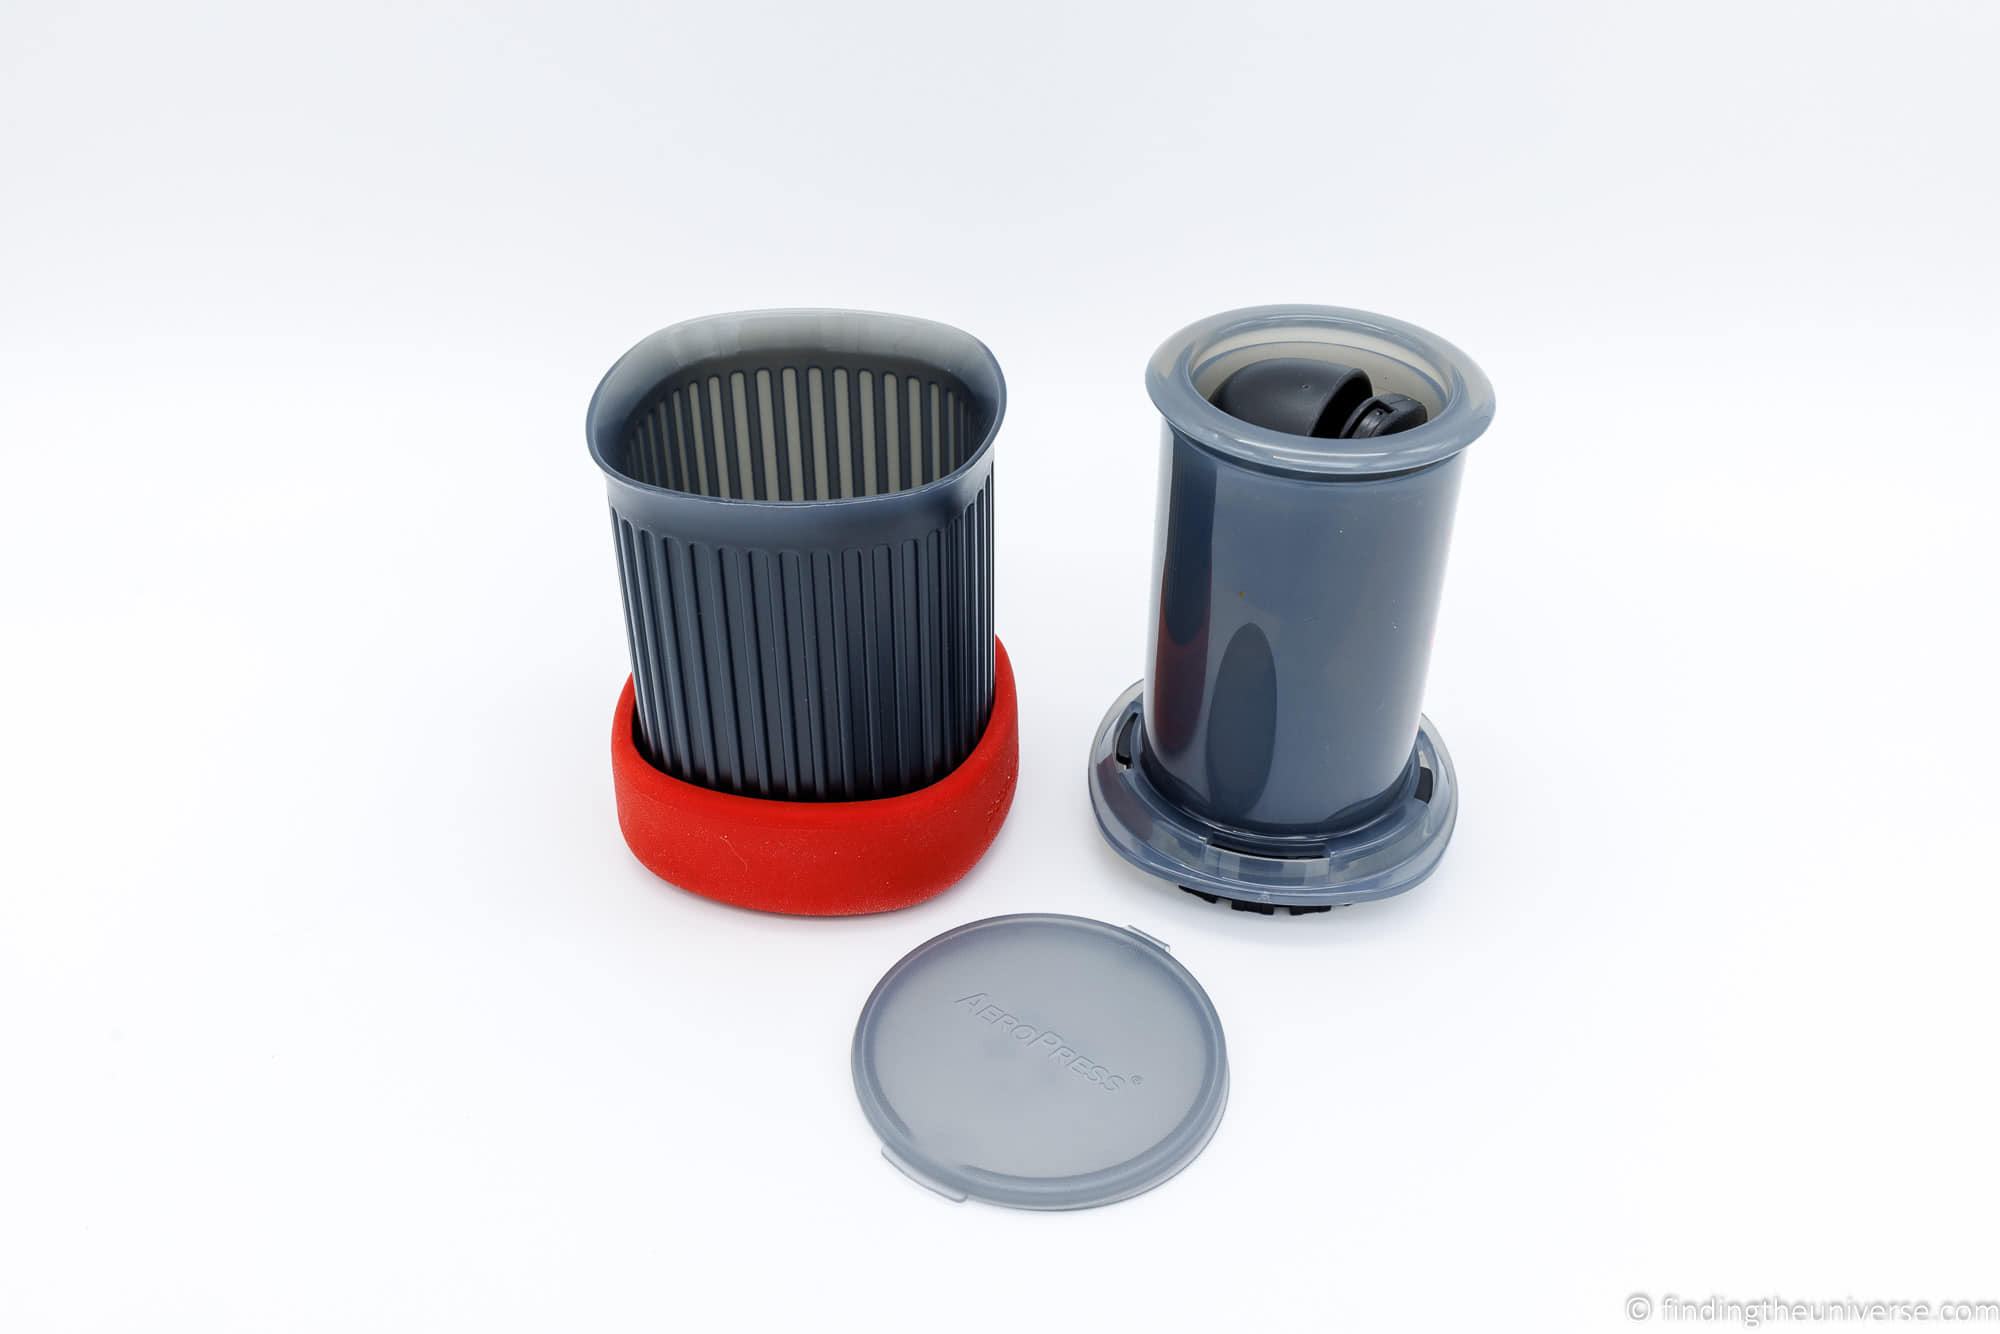
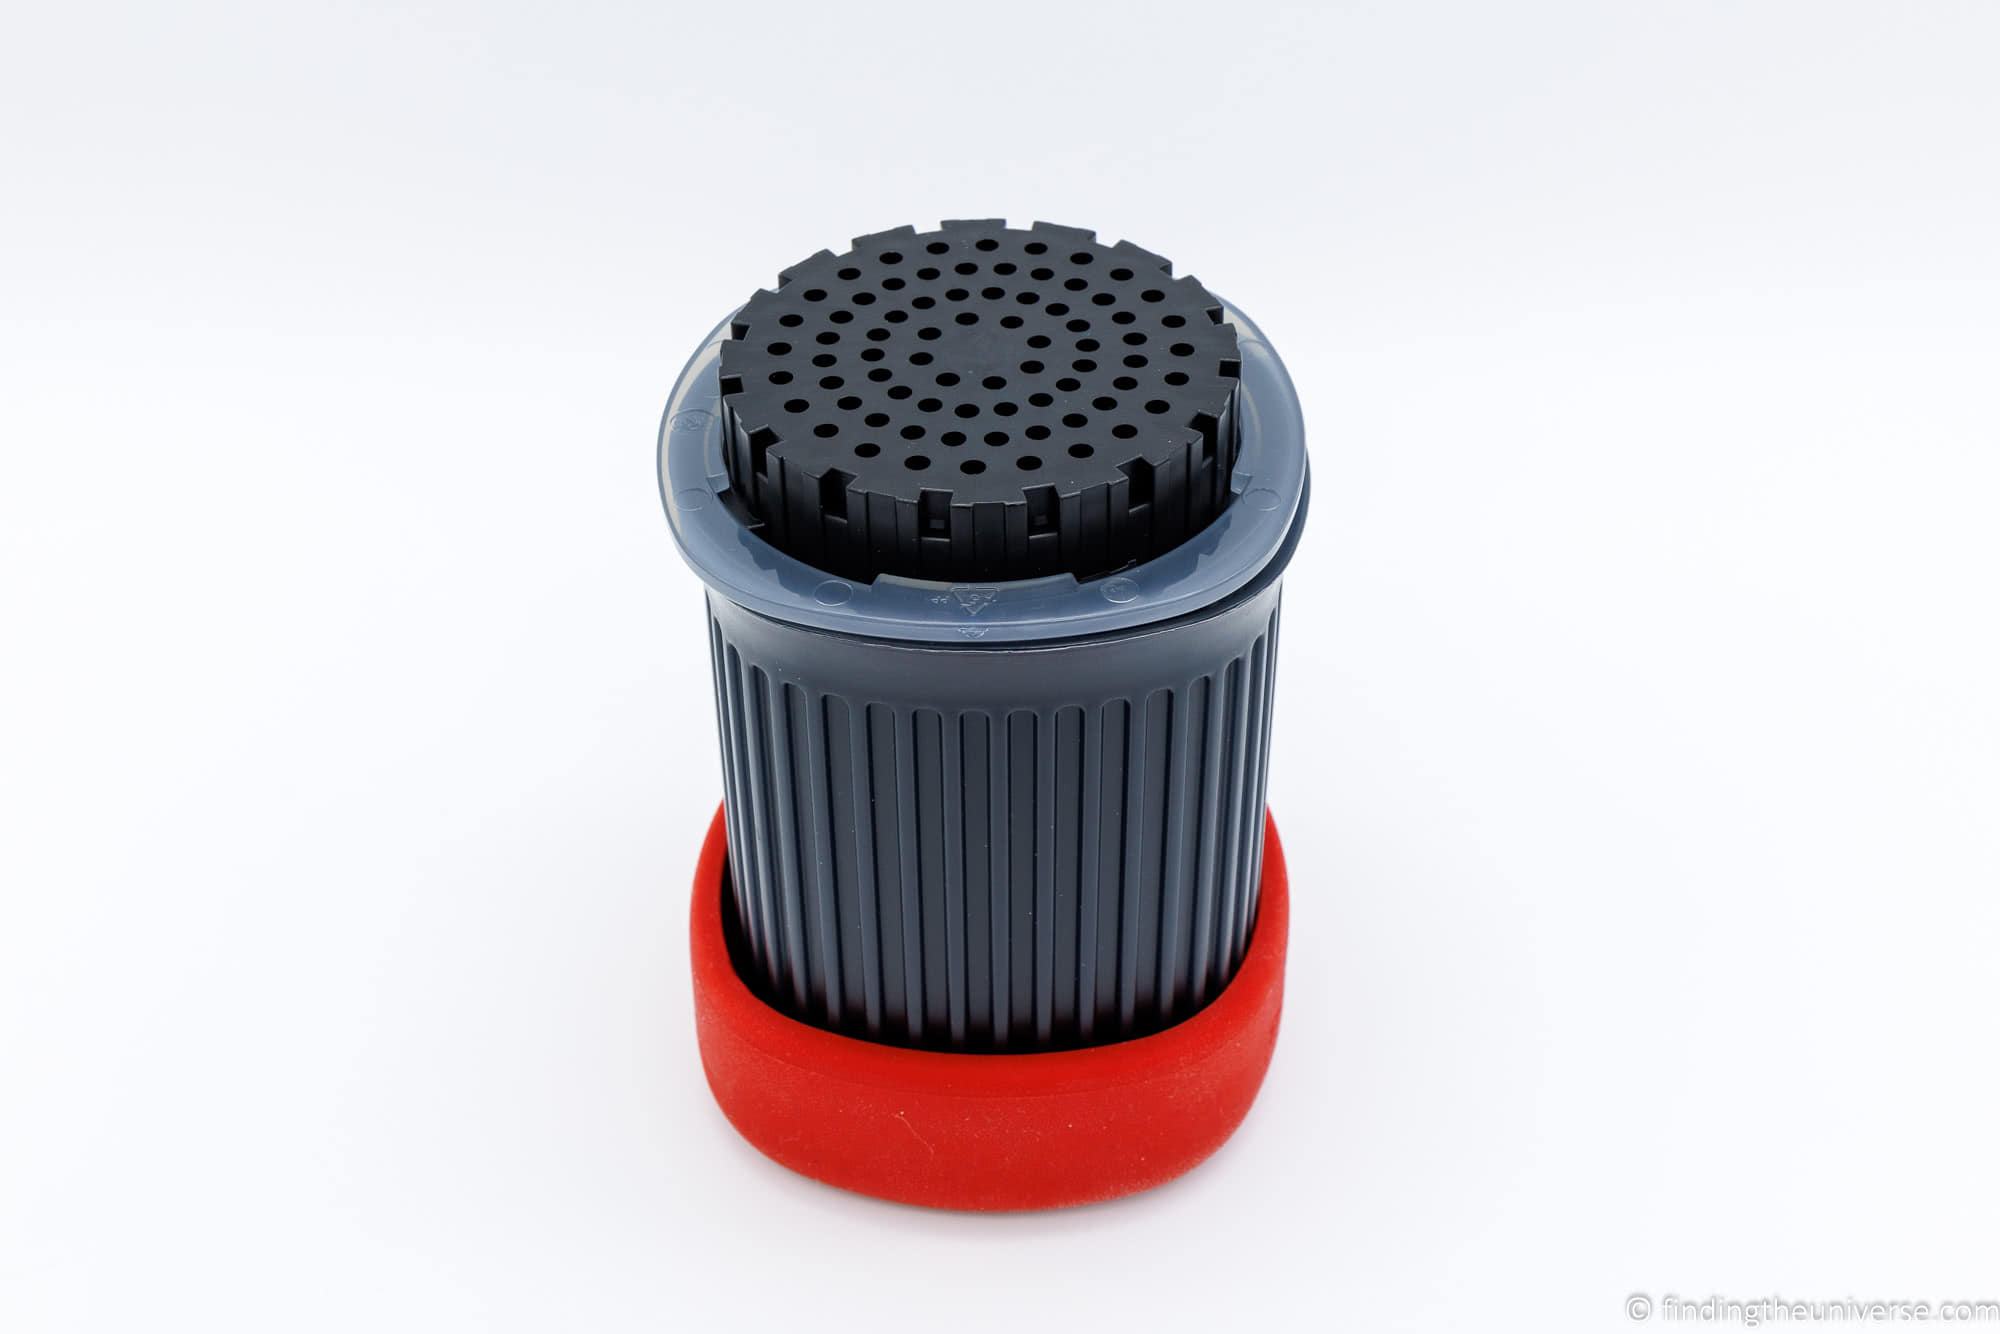
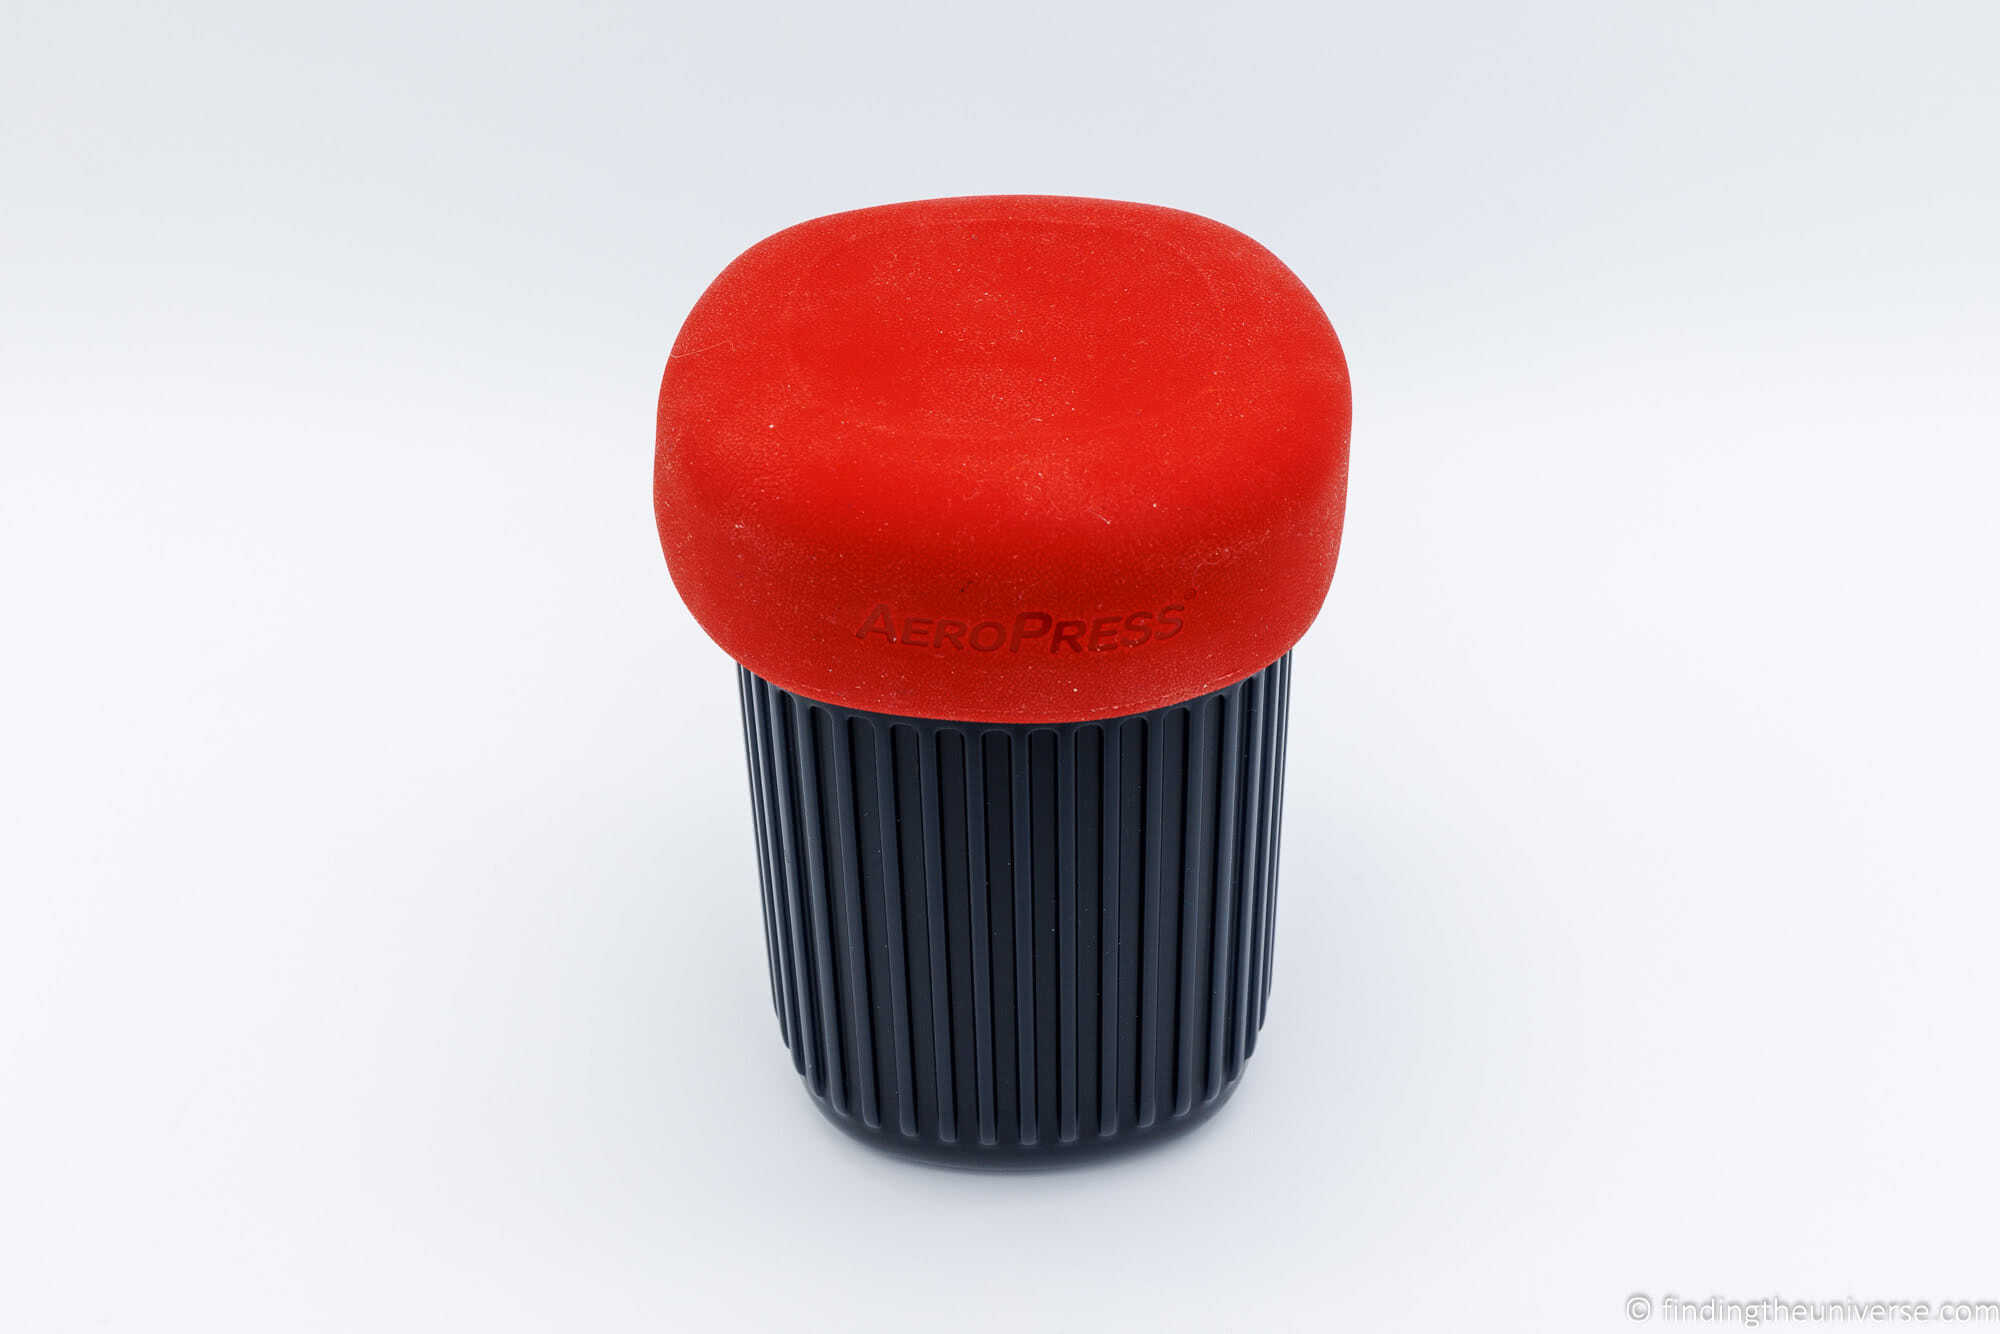
Everything apart from the pack of 350 micro filters is packed inside the 15 0z travel mug. You can pack up to 20 filters to take with you in the small filter holder, which does fit inside the travel mug. Everything fits in snugly and doesn’t rattle around.
The mug is a slightly odd shape, being partly square with rounded corners. This helps maximise volume versus a round mug of course. In my use I’ve never had issues with liquid spilling out, but you might prefer to drink from a corner nonetheless.
It’s worth noting that the lid on the mug is not the kind you can drink through as you might find on many travel coffee mugs. It is really more of a lid which is designed to keep all the parts in place when the cup is not in use, and to keep them secure.
Whilst you could put the lid on the mug, it doesn’t form any kind of seal. Instead, you might consider using it as a coaster when drinking and brewing, as it is very grippy and is less likely to slide off a surface than the mug itself. I like to put the lid under the AeroPress Go when brewing and drinking.
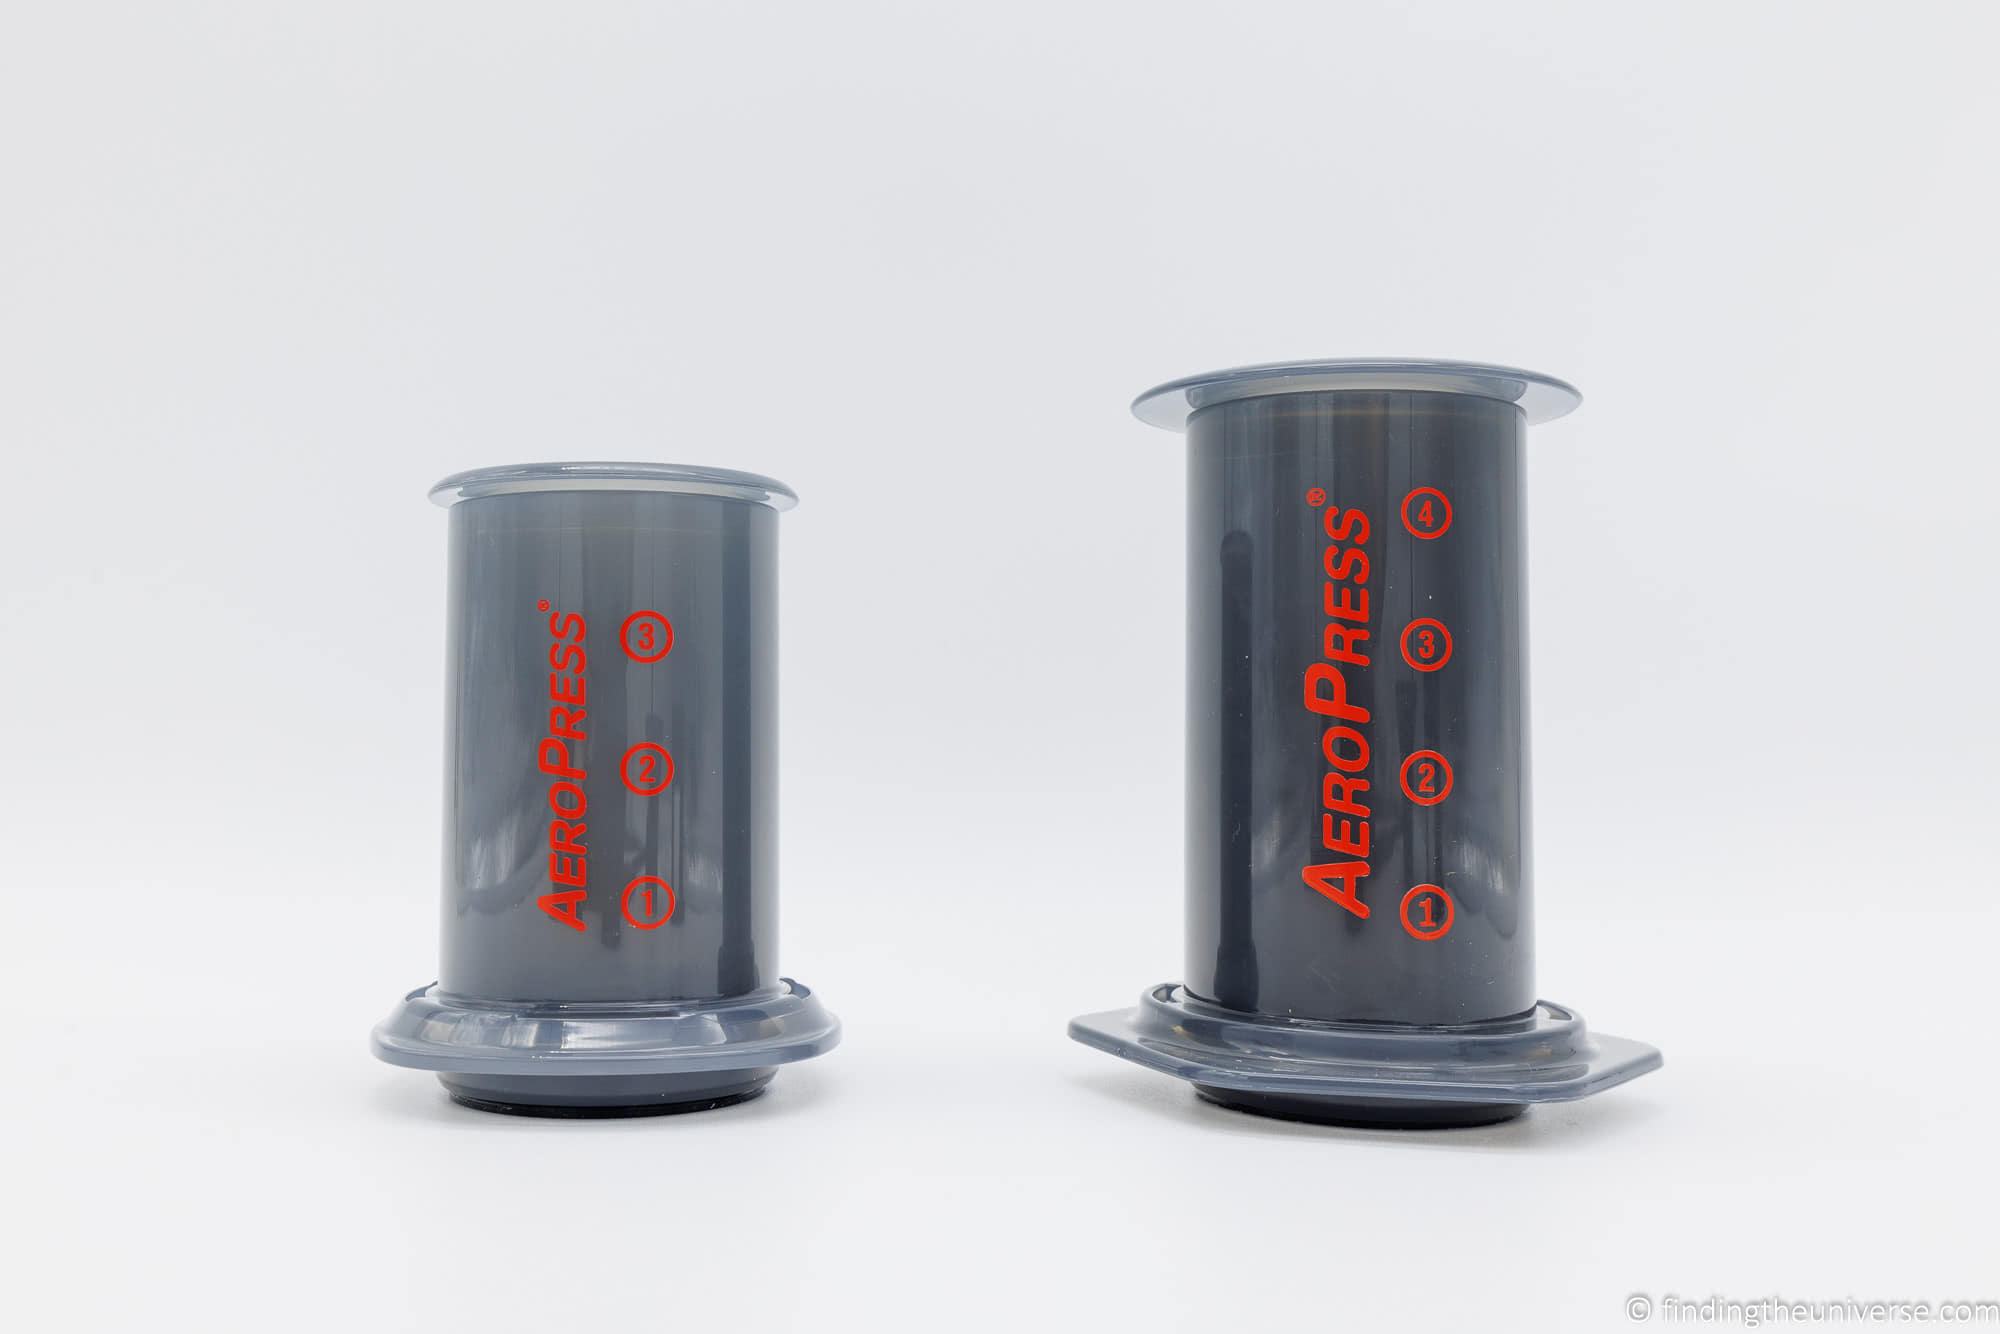
The most obvious difference when comparing the AeroPress Go with the original AeroPress is that the chamber is smaller, a necessity in order to fit inside the mug for packing up. In addition, the two accessories supplied, the stirrer and scoop, are also designed to fit inside the mug.
The scoop is smaller (although it holds the same amount of coffee), and the stirrer conveniently folds in half, making it much more practical for travel.
The brewing process is exactly the same, with the advantage that you have a mug with you. The mug, as you would expect, is the exact right size for the AeroPress chamber to sit on, although it doesn’t clip into place or anything like that.
When I first got the AeroPress Go I was a little disappointed because I thought the cup was going to more seamlessly attach to the chamber base for a more sturdy result. However, in the real world, I have found it all to be very stable and easy to use. Even in windy conditions I’ve not really worried about it blowing over.
I have not noticed any discernible difference between the coffee brewed in the AeroPress Go and the original AeroPress. This should be expected as they basically do the exact same thing in terms of brewing process, the only difference is that the chamber is a bit smaller so you brew a bit less coffee.
For on the go brewing, I think the AeroPress Go is a great option. It packs up really small, is very fast and easy to use (just be sure to find a stable level surface), and there’s minimal mess. The coffee it produces is also fantastic.
A couple of things to keep in mind, based on our own experiences when traveling with the AeroPress Go is the filters and cup. First, the filter holder only holds up to 20 filters, so if you are going on a long trip or planning to brew multiple cups a day, you may want to consider getting a reusable metal filter so you don’t have to worry about having enough filters. Also there is only one mug so if not traveling solo, you may still need to bring along extra mugs or thermoses.

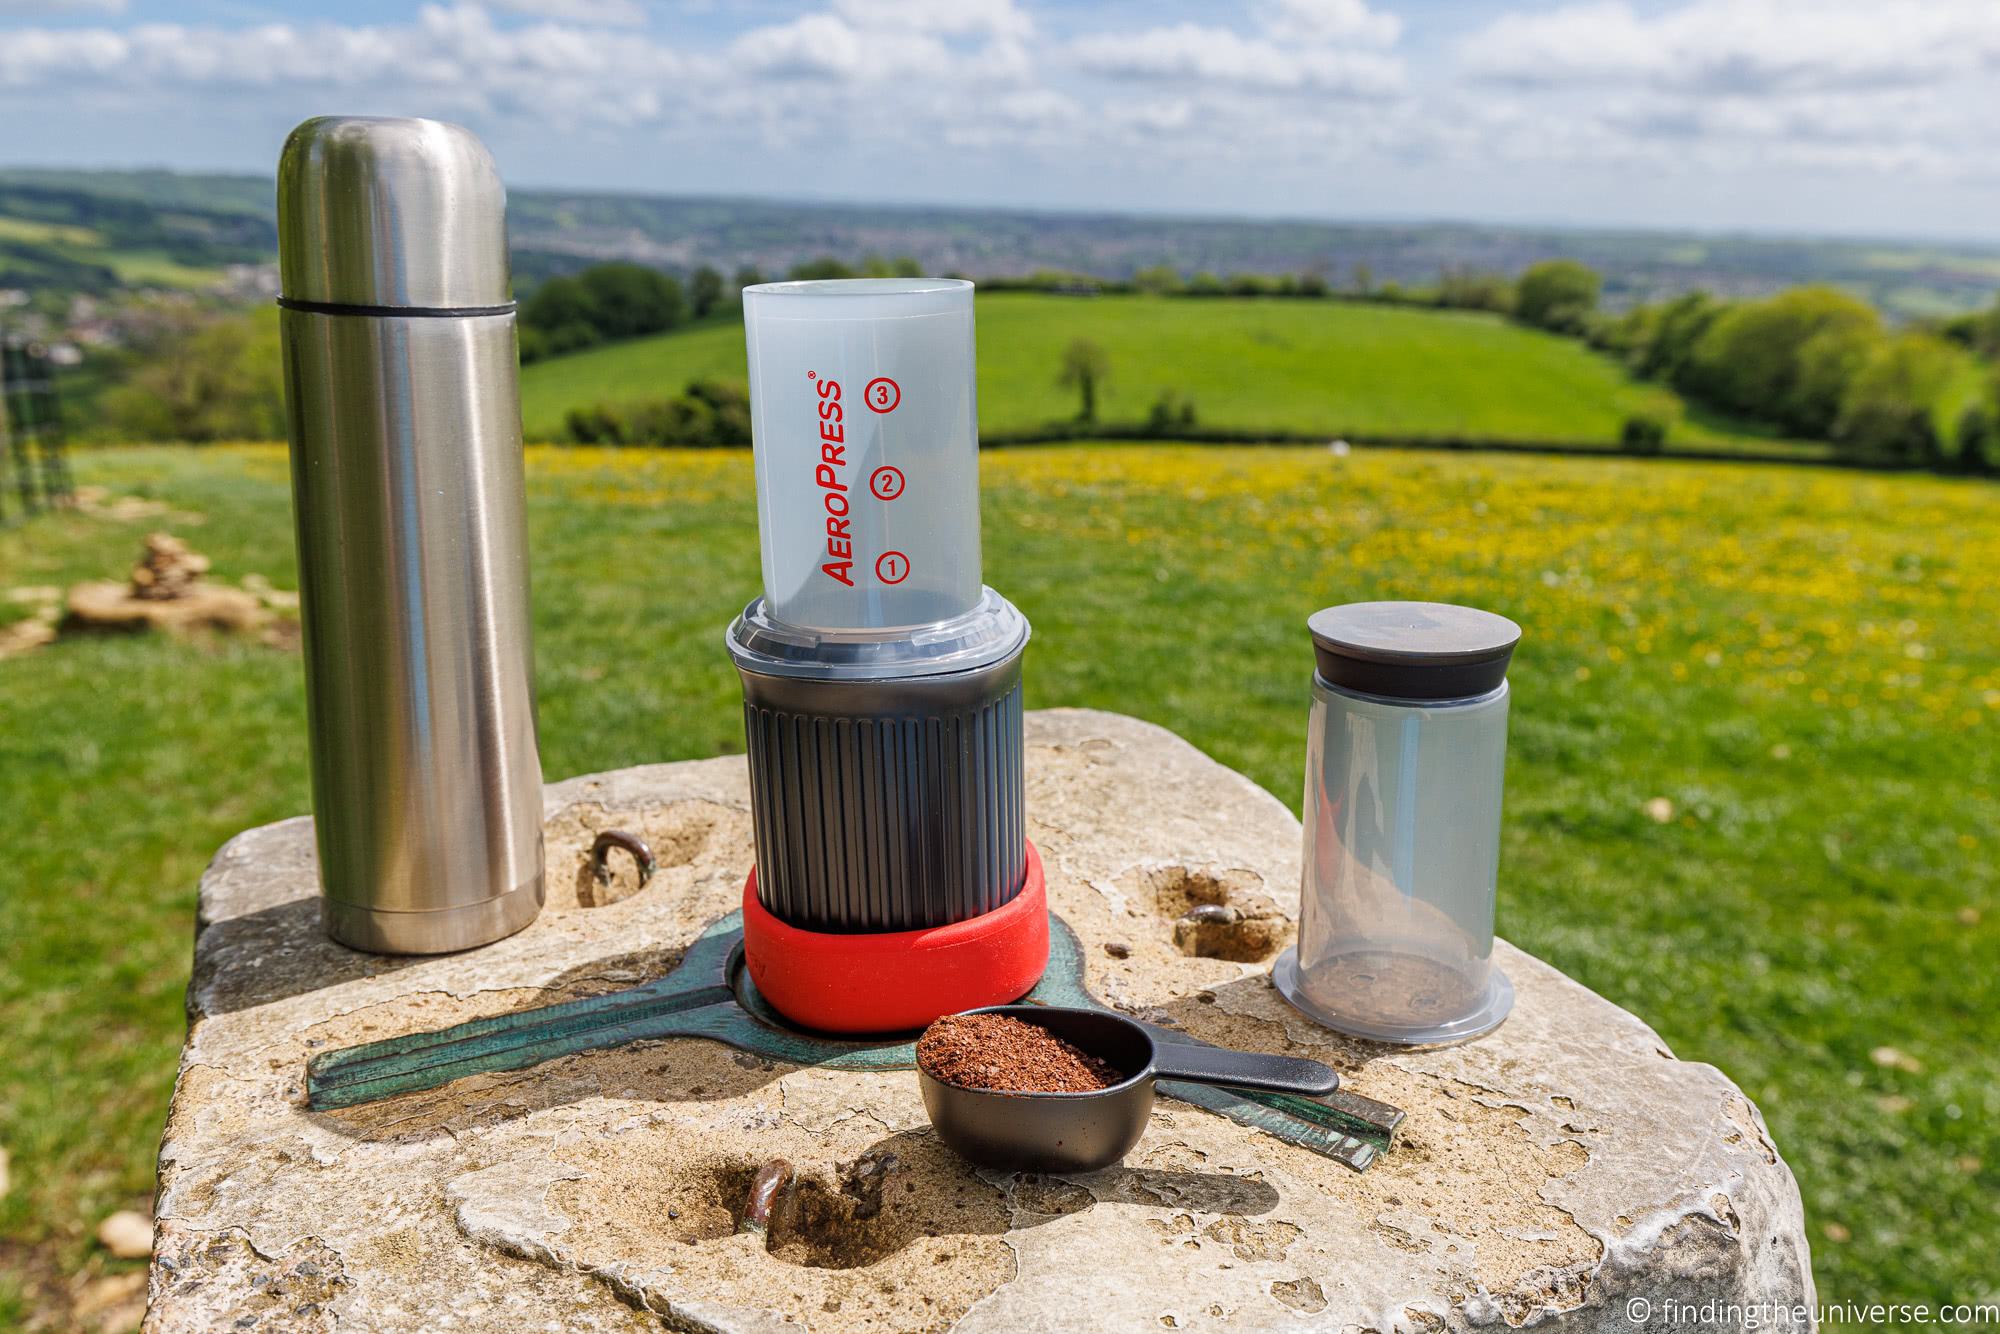
AeroPress original vs AeroPress Go for Travel
Here are the key specification differences of the AeroPress original and the AeroPress Go that are worth considering from a travel perspective:
- Weight: The AeroPress Go weighs 11.4 oz (323 g) when packed for travel. The AeroPress original with tote bag weighs 13 oz (368 g) if all accessories are packed, or 8 oz (225 g) when packed with the key items for travel as recommended by AeroPress.
- Dimensions when packed. AeroPress Go (in mug) 4.6 x 3.6 x 3.6 inches (11.7 x 7.6 x 7.6 cm). AeroPress original: 5.4 x 4.2 x 3.8 inches (13.7 x 10.7 x 9.7 cm).
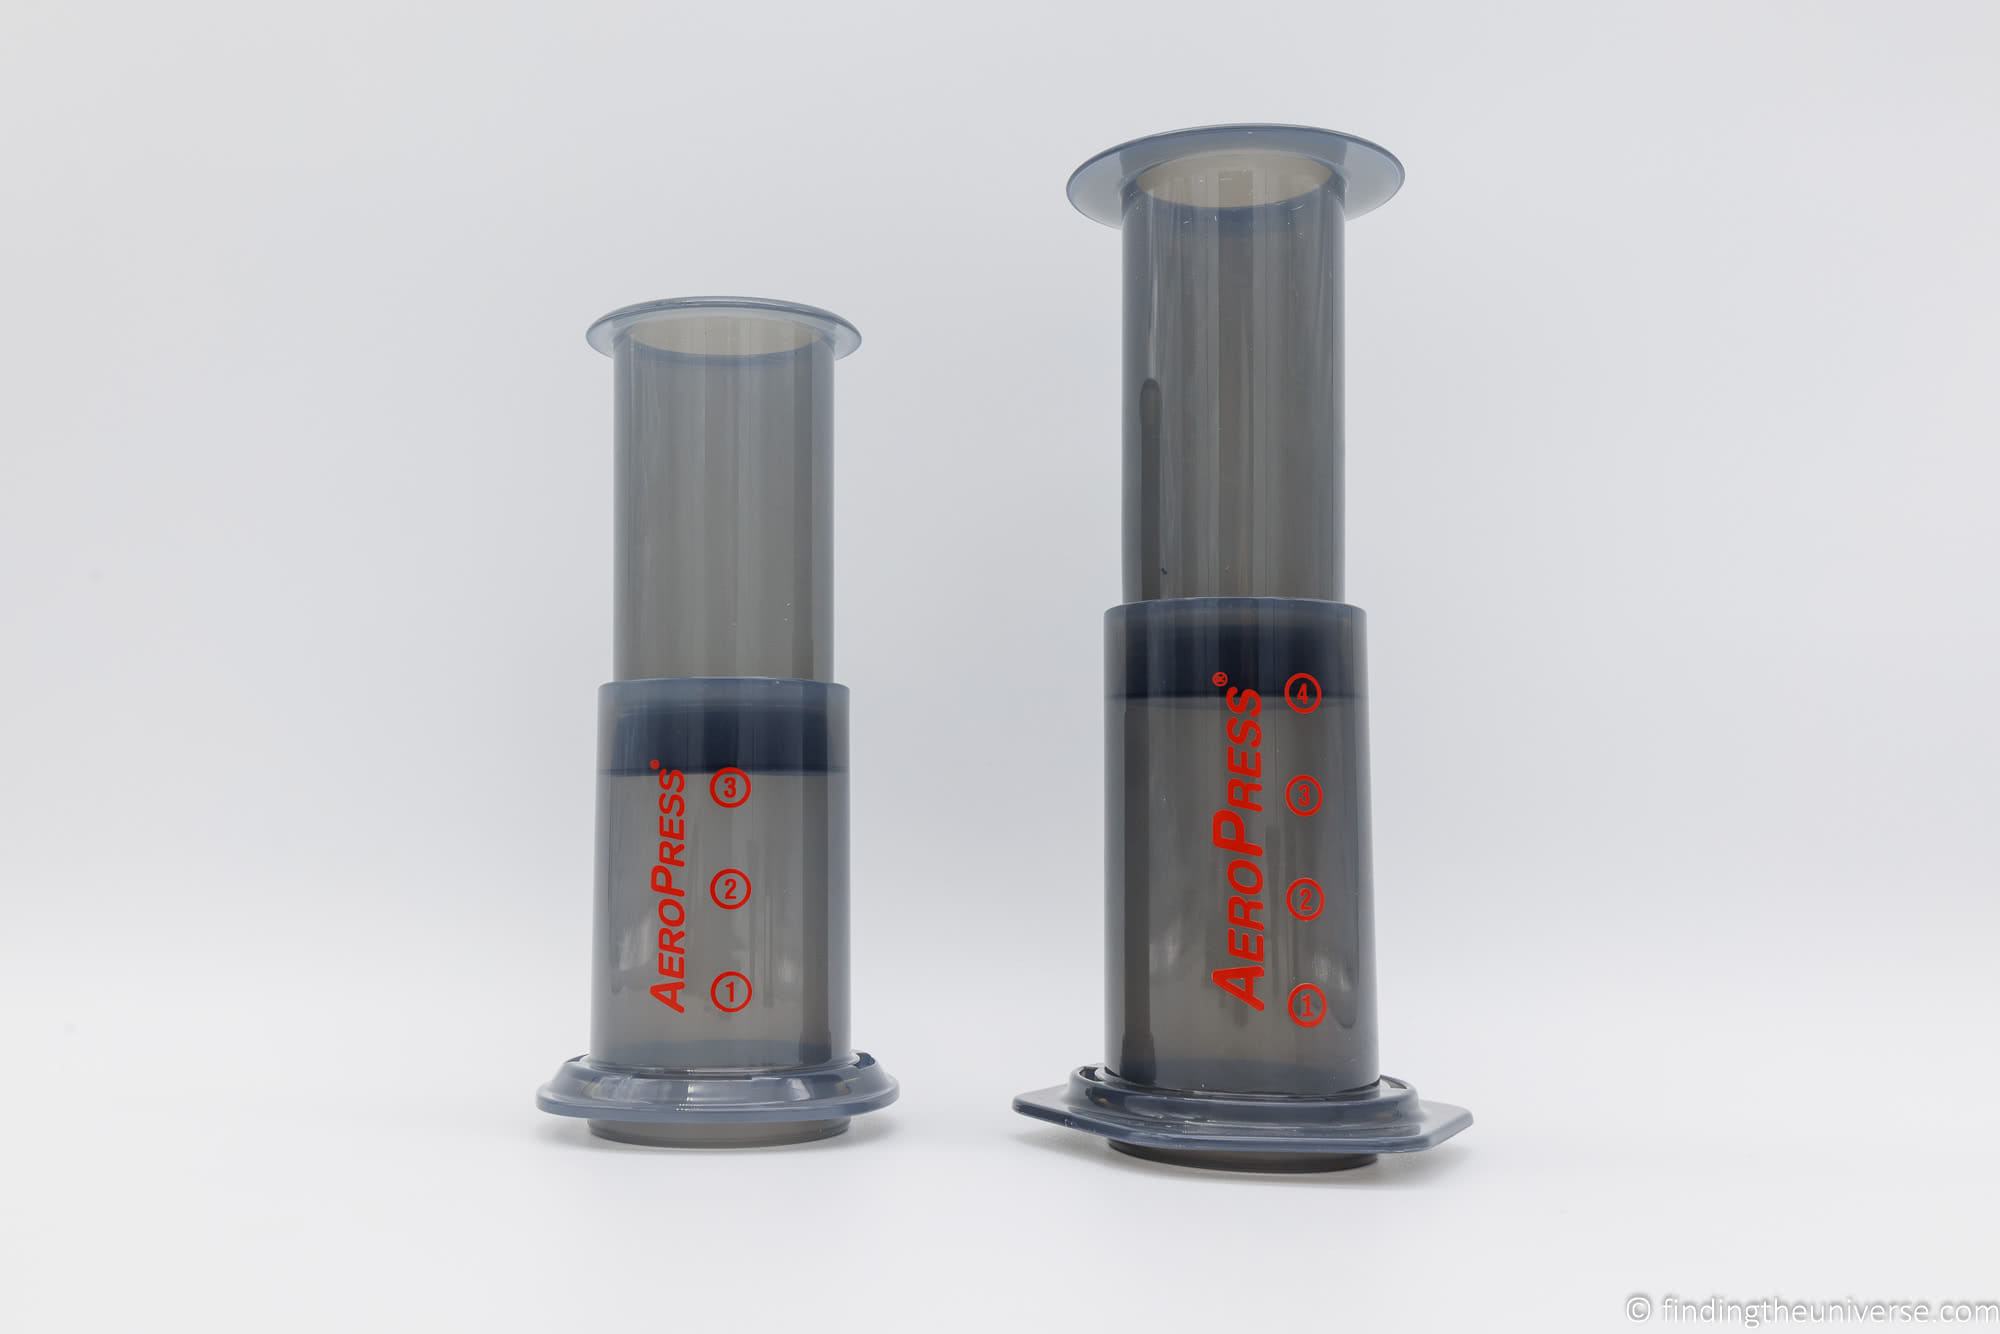
- Coffee produced (per brew): AeroPress Go up to 8 oz (236ml). AeroPress original up to 10 oz (295ml),
On the face of it, the AeroPress Go looks like the logical choice for travel as it is an all-in-one solution which packs away into a small neat package. However, there are a few things to consider:
- If you already have a mug you like to travel or camp with, and it fits the AeroPress Original, then this would make the AeroPress Go mug redundant for solo travel.
- Whilst the AeroPress original is heavier when you consider all the components, you would be unlikely to bring along all 350 filters with you, and in our experience, you can also leave things like the scoop, stirrer, and funnel behind. AeroPress suggests that the packed weight of the original with the parts most people travel with would be 8 oz (225 g), which we agree with.
- If you are traveling with multiple people, you will still need additional mugs for others to drink from, and the larger amount of coffee brewed by the AeroPress original might be advantageous in this scenario.
If you are deciding between the AeroPress Original and the AeroPress Go, my suggestion is to think about the mug, and how many people you are planning to make coffee for.
If you don’t already have a mug you love, and you normally brew coffee for one or two people, then the AeroPress Go is a great travel solution that packs up very tidily. In our opinion, the way it packs up so neatly is a real strength.
If you already have a mug or mugs for all the people you plan to travel with, such as a camping mug, then the AeroPress Original with the tote bag would be my recommended option as this way you don’t get a redundant mug. You just want to be sure the diameter of the mug fits the AeroPress original diameter so you can brew the coffee.
The amount of coffee brewed is also something to think about. The 2 oz (60 ml) difference might not sound great, but it could be the difference between two nice cups from one press vs two slightly weaker cups from one press.
Of course, you can adjust variables like the amount of coffee you use, and whether you add hot water to the cups after the brew to compensate for the strength of the coffee. But it is worth considering.
There are some other differences which might also influence your decision, such as the folding stirrer, redesigned scoop, and slight difference in volume of coffee brewed. These are personal choices based on what is important to you, and there’s no wrong answer.
Honestly, I don’t think the accessories are particularly essential for either product. Sure, a scoop is nice to have, but the stirrer (and funnel with the original AeroPress) are definitely not essential.
Below are some images comparing the two products and accessories side by side.
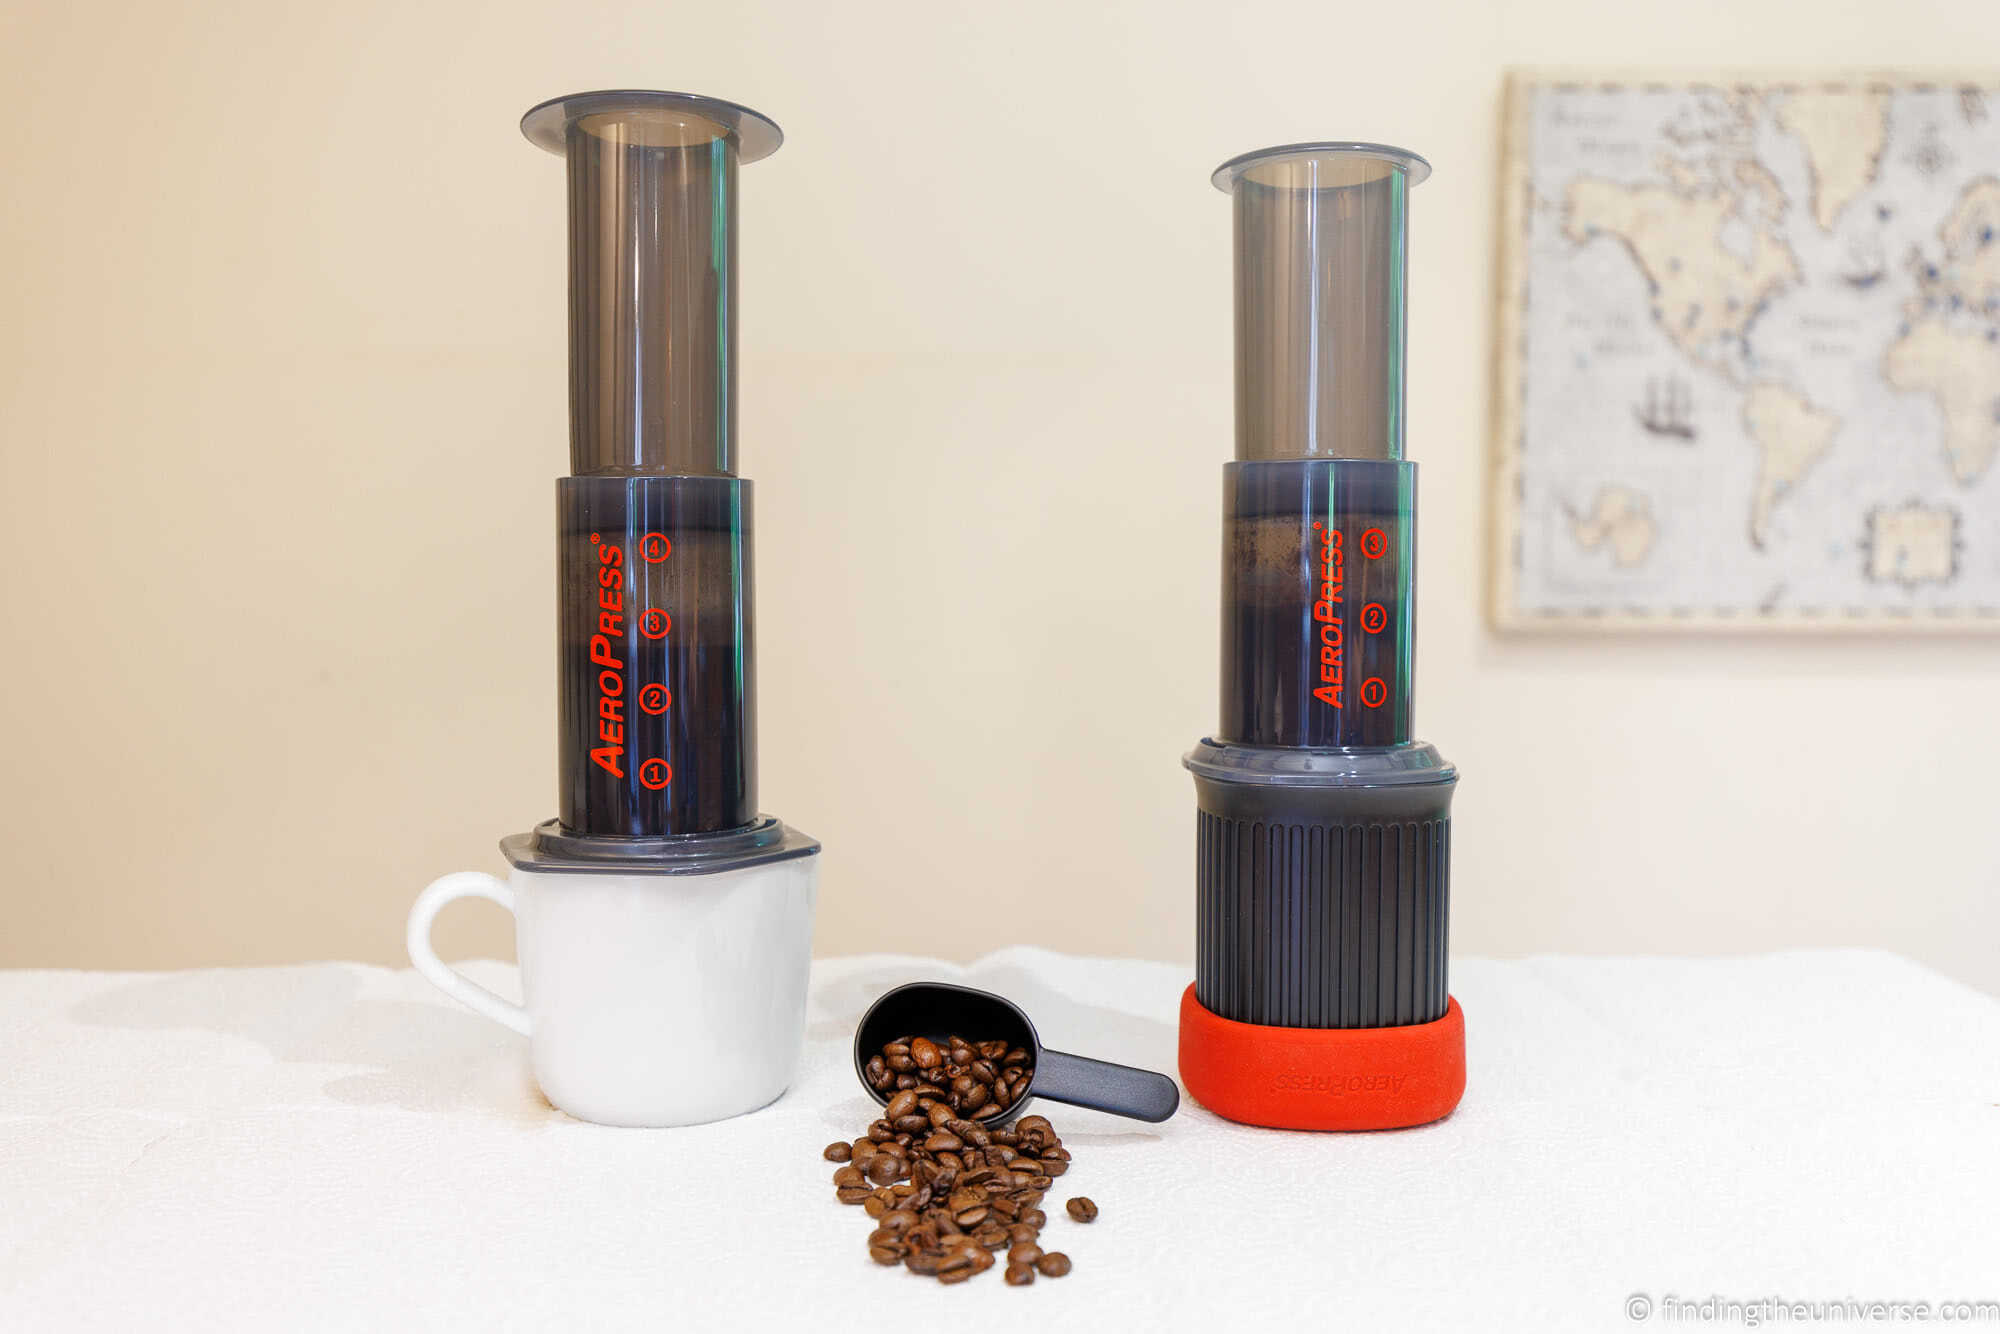
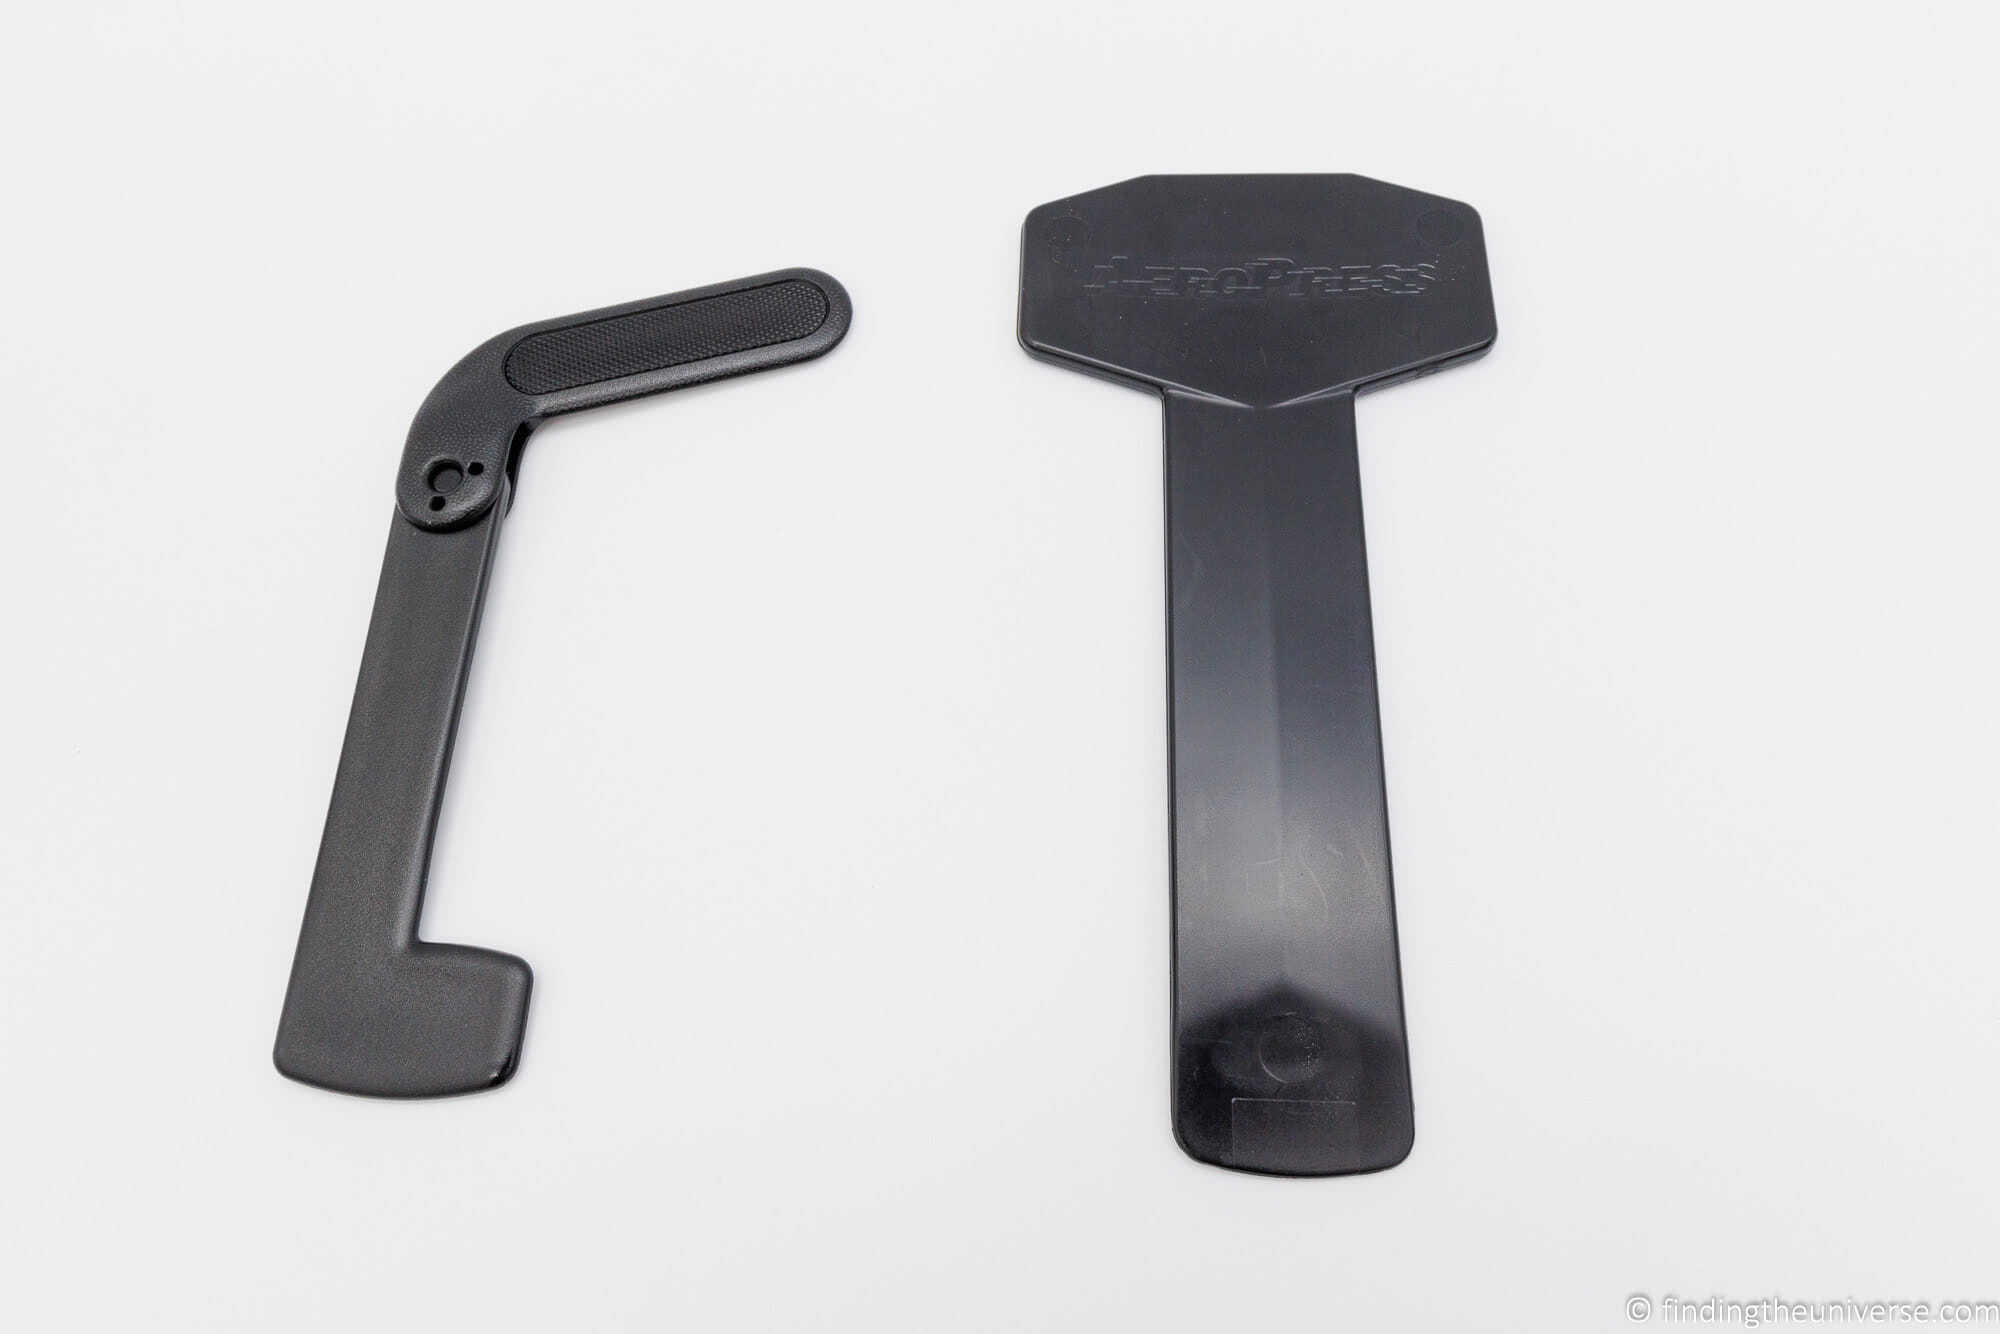
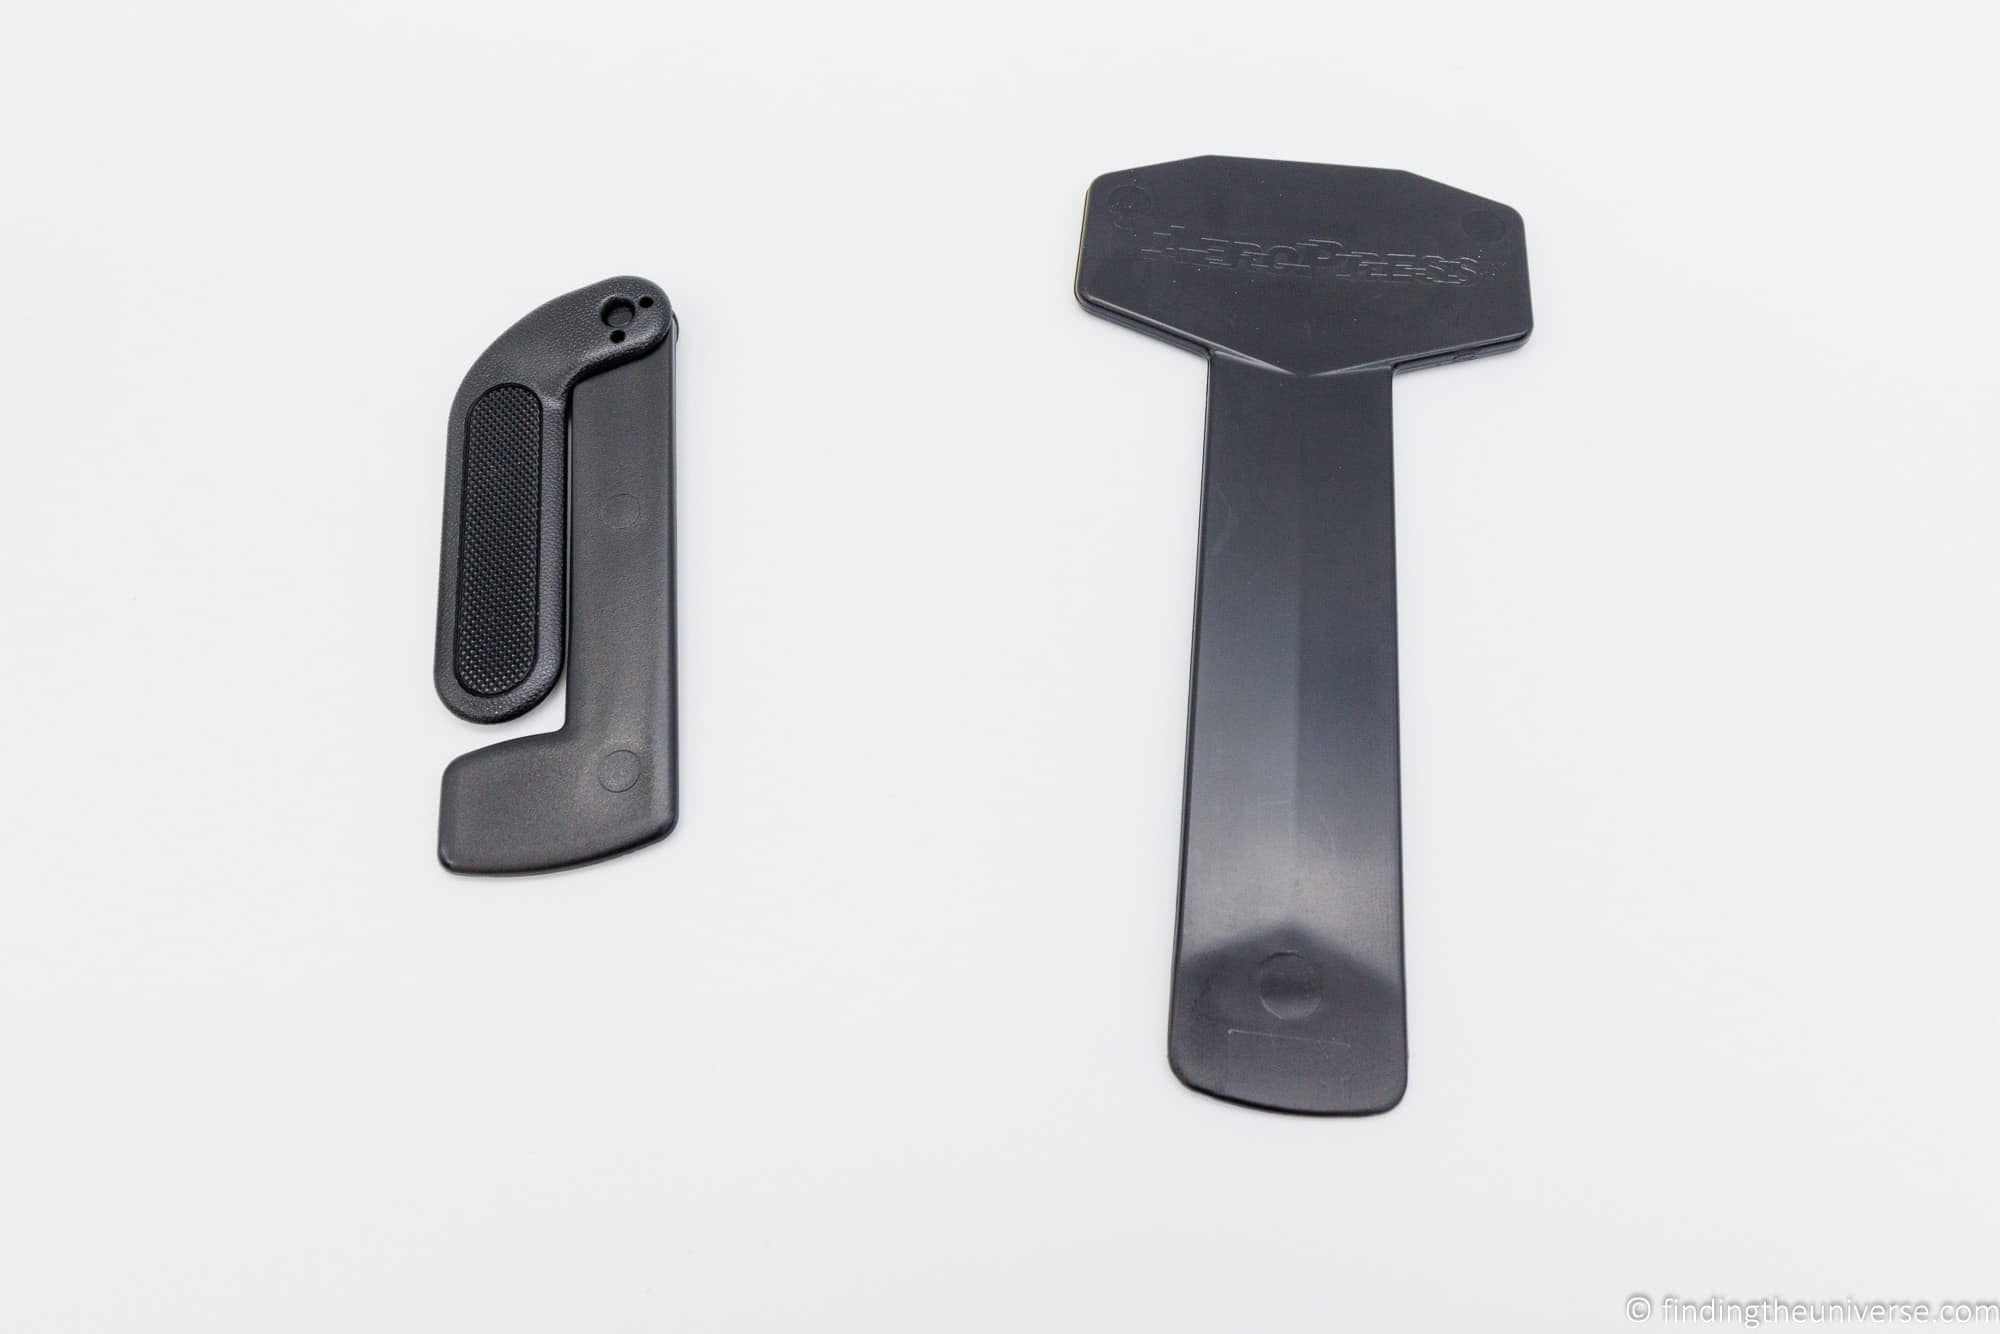
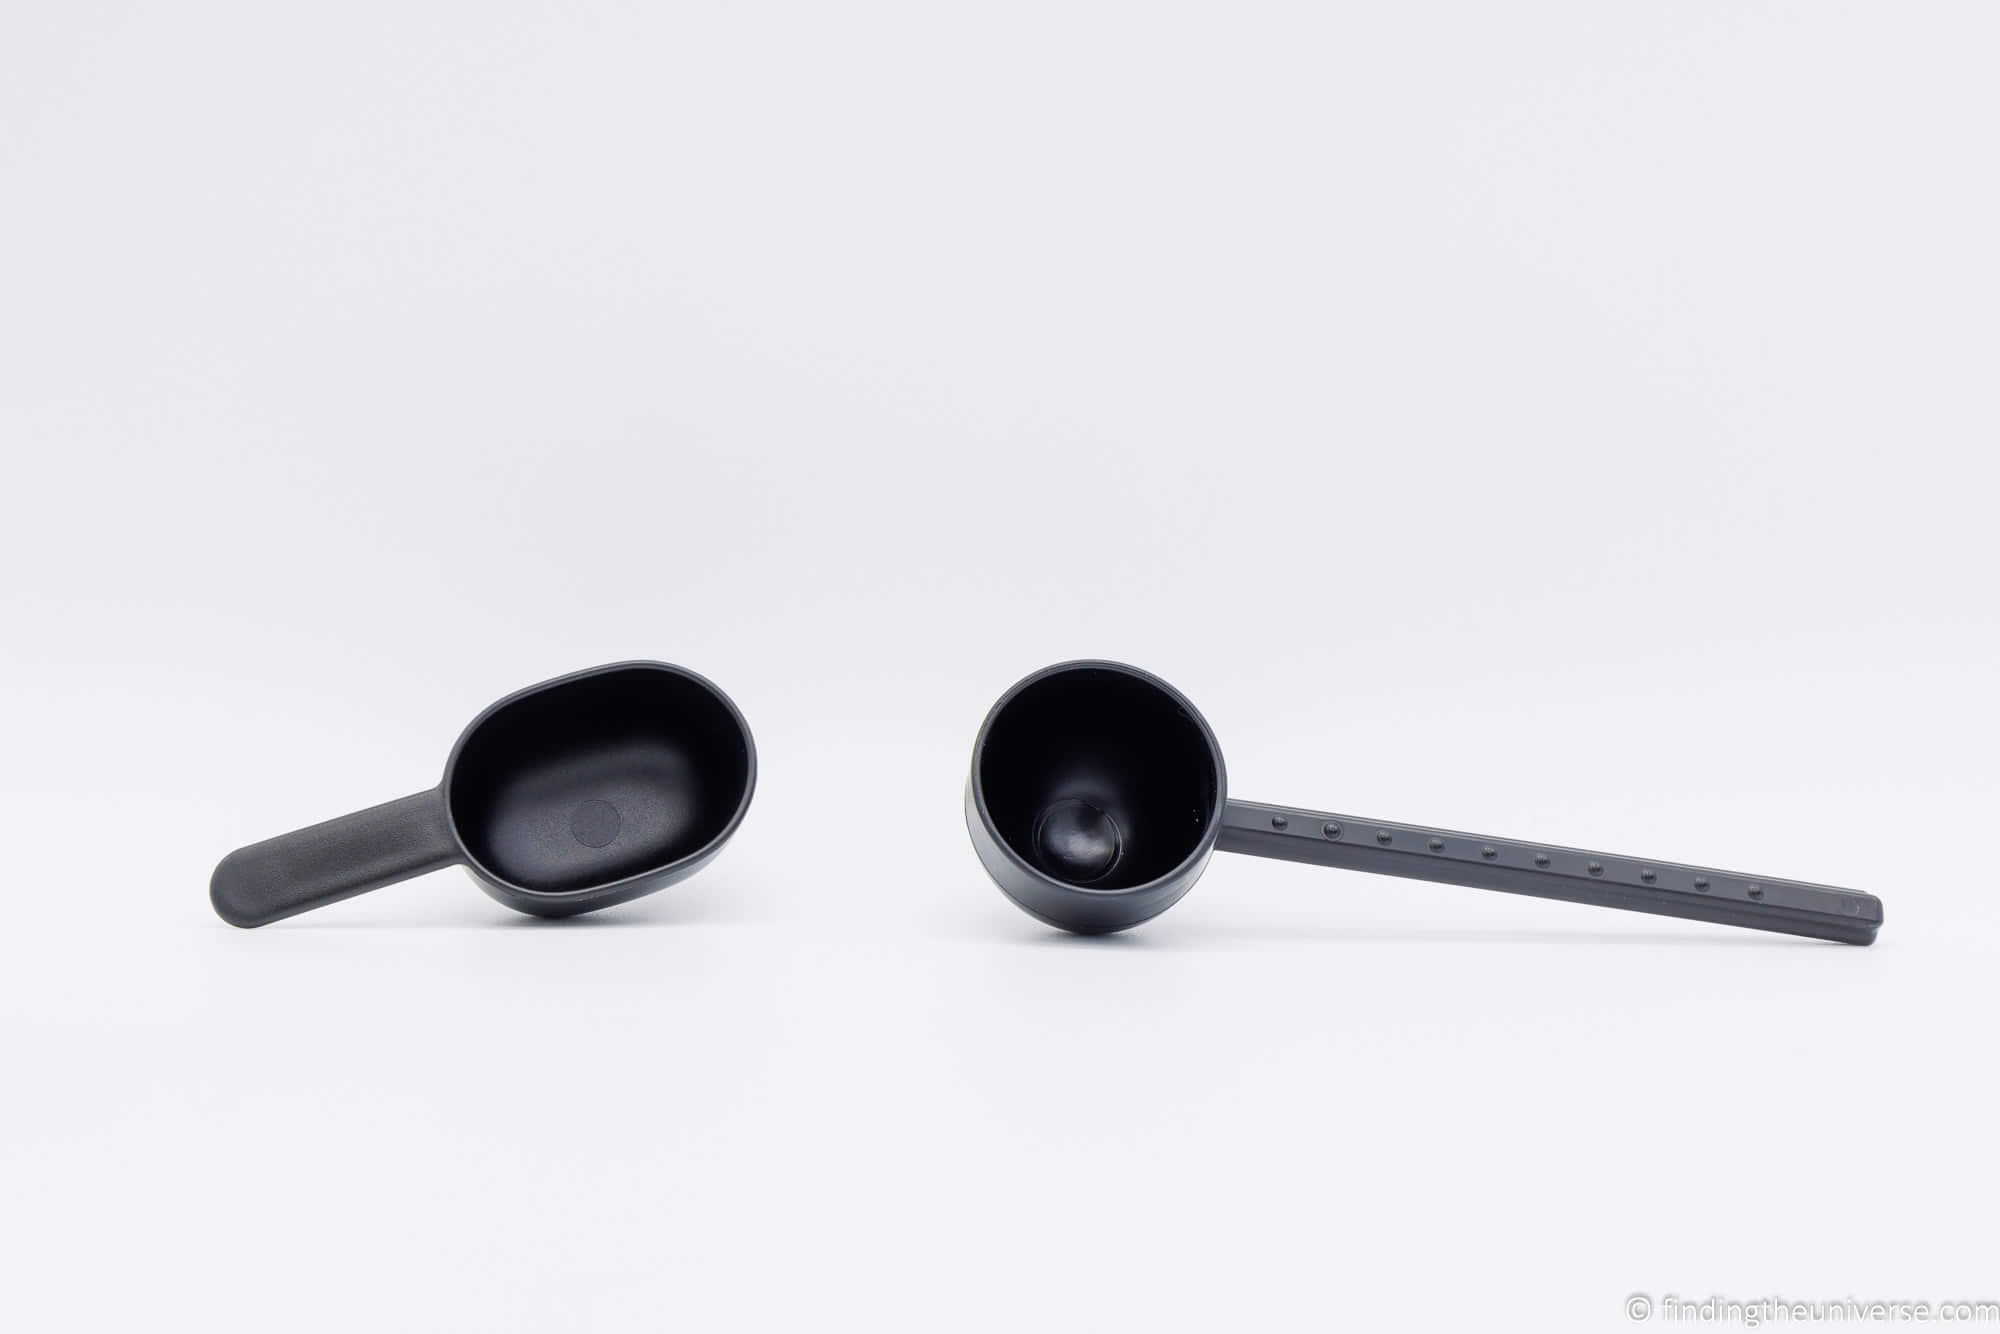
Which AeroPress Coffee Maker is Best for Travel?
As is hopefully clear, both AeroPress coffee makers produce the same style of coffee. As the process for coffee creation is the same, the coffee produced is also the same. So you don’t need to worry about compromise when picking one or the other products from a coffee point of view.
The main difference comes down to whether or not you want a mug and how much coffee you want to make.
The AeroPress Go comes with a travel mug, which doubles up as the storage container. This makes for a really compact and easy to travel with coffee making device.
However, if you already have a mug you like to travel with, the AeroPress Original is a compelling option. If brewing for multiple people, or you just want to be able to brew more in general, then the AeroPress original has the advantage as it can brew more coffee compared to the AeroPress Go.
Personally, we used to travel with the AeroPress original but we now travel with the AeroPress Go because we like how neatly it packs up, and that it comes with a mug. Obviously, as a couple we still need to have another mug. Normally we brew one stronger blend, and then add water to the coffee output to create a mug each.
For home use, we prefer the original AeroPress because it makes slightly more coffee.
However, your needs might be different, so just pick the right version for you.
AeroPress Travel Tips
Now you’ve decided which AeroPress is best for you, we wanted to share some tips on traveling with an AeroPress to help you get the most out of it.
- Remember you need something to drink the coffee out of. You will want to ensure you have enough cups for the number of people you plan to make coffee for. If you are using the AeroPress Go, this comes with one cup, so just remember to pack cups for any other travelers in your party
- Pack coffee. Obviously an AeroPress will only work if you have coffee to brew! You can pack ground coffee (simplest option), or you can bring beans and grind your own if you have a portable grinder. Make sure to bring enough coffee for your whole trip, or have a plan for where you can stock up if needed.
- Plan your hot water. For normal hot coffee, you will need a source of boiling water. This could be from a travel kettle, a kettle or coffeemaker in a hotel room, a stove top pan, or a campfire kettle or pan. The main thing is having hot water. If you want to make coffee in the day between access to hot water (such as travelling between hotels which often have kettles in the room), consider investing in a flask or thermos that will let you keep water hot for a prolonged period of time. Alternatively, you might invest in a coffee maker which has a built-in heating element. See my guide to portable coffee makers for some options.
- Rember that if you don’t have access to hot water, you can still use cold water or room temperature room to brew coffee with the AeroPress or the AeroPress Go. Cold brew coffee instructions are provided.
- Think about the cleaning. The AeroPress is very easy to clean, and AeroPress recommends just giving it a good rinse in between uses (particularly the seal) and to periodically give it a good washing with warm water and dish soap. When traveling, you will need to think about the disposal of the used coffee grounds and paper filter.
- Store it safely. The AeroPress is quite a sturdy piece of equipment, but that doesn’t mean it is impossible to break. You will want to ensure it is safely packed away for your trip in between uses. When not in use, make sure you dry it thoroughly before packing away for longer term storage.
- Think about where you will be getting the water for your coffee. If you will be using untreated water or traveling to an area where the water may not be safe to drink, be sure that the water is properly filtered or treated before using. You may want to invest in a water filtration device, depending on where you are traveling.
AeroPress Accessories
One of the nice things about the AeroPress kits is that they come with pretty much everything you need to brew great coffee, whether at home or on the go. They also sell replacement parts for all the different parts of the coffee makers so if something breaks or gets lost, you can replace it.
However, there are a few accessories that you might consider, depending on your needs.
A Mesh Filter
One popular third-party accessory for the AeroPress products is a metal mesh filter to replace the paper filters that ship with the product. The advantage of a metal filter is that it is re-usable, so saves you carrying and discarding extra filters. It is also a more sustainable and travel-friendly option.
It is worth pointing out that AeroPress specifically recommends against the use of mesh filters because they feel you get better coffee from paper filters. As such, you cannot buy a mesh filter directly from AeroPress, and have to rely on third party options.
Of course, this is a question of personal taste, and how much of a difference a metal filter actually makes is obviously subjective.
We feel that the benefits of a metal filter in terms of the longevity and not having to remember to pack the paper filters is worth it, and we have not personally noticed a significant taste difference that would make it worth sticking to paper filters, although you might have a different experience.
There are a range of mesh filters – we recommend the Able Mesh filters which are made in the USA and come as a set of two with different filter mesh sizes.
A Tote Bag
If you buy the AeroPress Original, it doesn’t come with the tote bag as standard. You can opt to buy it as part of a set when you buy the AeroPress original, or you can buy it afterwards directly from AeroPress.
The tote bag is designed to fit the AeroPress original coffee maker along with its accessories. You can also use it for the AeroPress Go travel coffee maker. This is a great accessory for travelers, campers, and hikers.
Replacement Paper Filters
Both the AeroPress original and AeroPress Go come with 350 paper filters, obviously enough for quite a lot of coffee brewing! It’s also possible to re-use these filters.
However, at some point they will run out, at which point you can buy some new filters if you want to stick with paper filters.
AeroPress filters are widely available, and the AeroPress Go and AeroPress original both use the same size and type of filter. You can buy AeroPress filters online here.
Flask for Hot Water
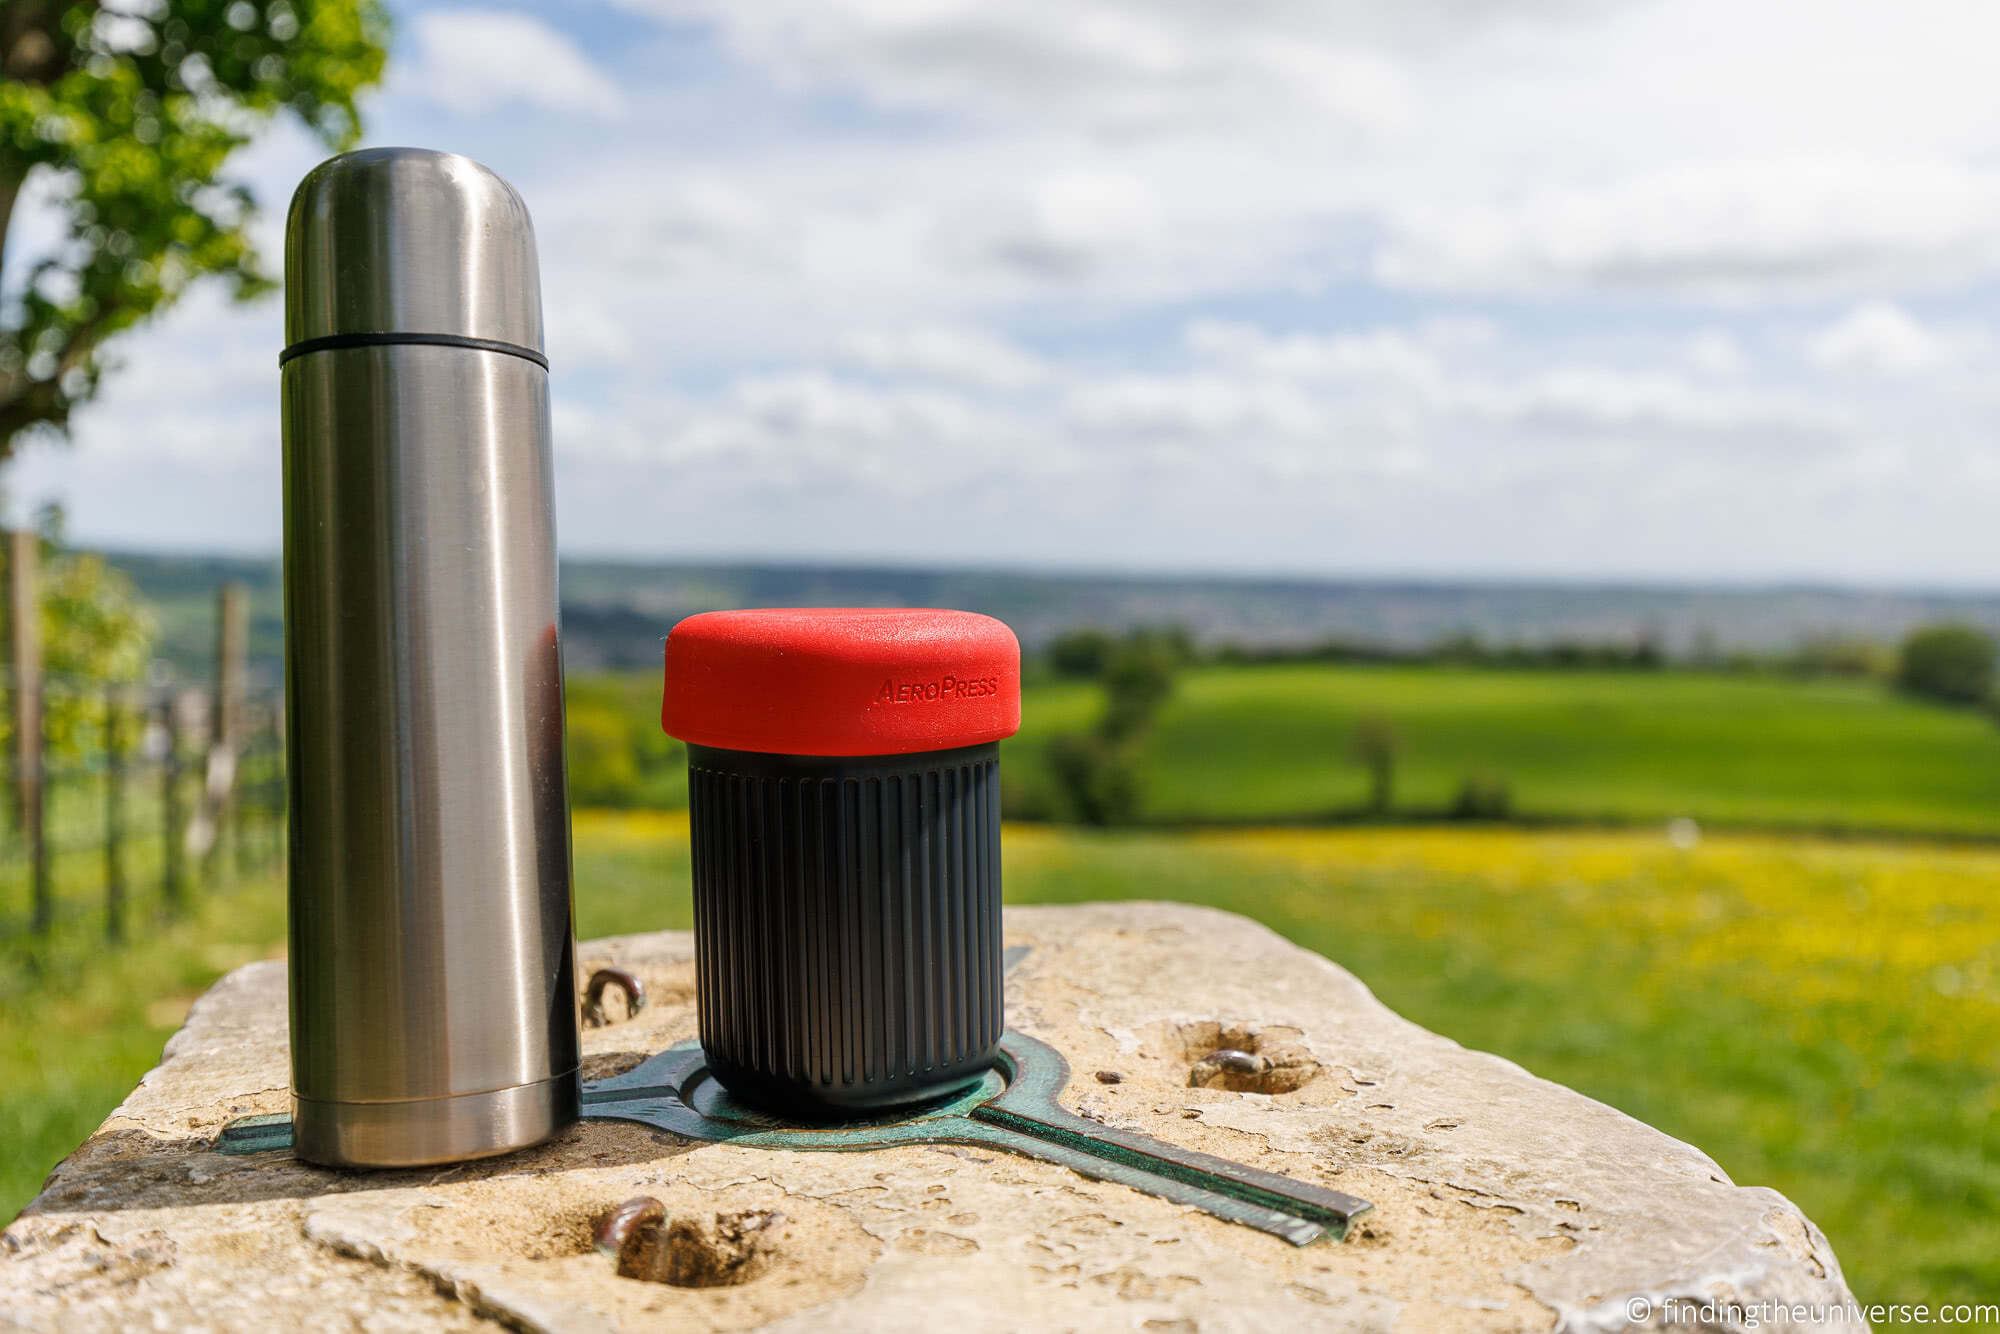
If you are just heading out for a day hike or a road trip, then you might consider an insulated flask for carrying hot water. These flasks can normally keep boiling water at a high temperature for a number of hours, meaning you don’t need to carry a water heater with you.
You can then just pour the hot water onto the beans to brew as normal.
Of course, this solution isn’t going to be practical for longer trips where you don’t have regular access to boiling water, but even on a road trip you will likely be staying overnight in a property with access to a kettle where you can prepare water for the day ahead.
We like to use a flask like this on days where we are doing a day hike. If traveling as a group you might also consider getting a flask where the lid can be used as a cup. This will save you carrying at least one mug.
A Travel Coffee Mug
If you are travelling solo with the AeroPress Go, then a travel mug is probably unnecessary. However, not everyone will want to use the built-in mug, in which case you will need another mug option.
One option would be a travel focused coffee mug which offers insulation so that it can also double as a flask for holding hot water for brewing.
There are a wide range of these on the market. Our tip would be to find one that offers a leakproof seal, and is thermally insulated to keep your coffee warm. Again, you will want to make sure that it is the right size for your AeroPress maker
One travel coffee mug which fits AeroPress brewers is this mug from THERMOS, but there are several brands on the market to choose from when looking for a travel mug. We also like Contigo and Stanley travel mugs.
Camping Coffee Cups
For a camping specific trip where weight is an option consider lightweight stackable camping mugs or collapsible cups.
Make sure to get sufficient mugs or cups for everyone on the trip, and ensure that it is sturdy and the right size for your AeroPress maker (although with the AeroPress original you can use the funnel for smaller cups).
Our recommendation is to pick an option that can handle hot water, has a handle, and is easy to clean and store. There are lots on the market to choose from, see some options here.
Coffee Grinder
If you want a great cup of coffee, then grinding your own beans is a great option. There are a plethora of coffee grinders on the market, spanning a range of prices.
For travel, we recommend a compact manual grinder. It is more work, but it means you can still grind your beans when off-grid. We recommend the JavaPresse Manual Coffee Grinder.
This is built to last, featuring a stainless steel body, a durable ceramic burr, and an adjustable grind selector for optimal results. This portable coffee grinder can be used anywhere, be it hiking, camping, backpacking or out on the open road.
It features a built-in adjustable grind selector so you can fine-tune it to get the coarseness you want.
Travel Kettle
A travel kettle, or some way to heat hot water, is another accessory you might consider.
Whilst we would normally not recommend traveling with a kettle due to space and voltage compatibility issues, a travel kettle is definitely an option to consider for those of you in campervans/RVs or who are regular campers.
This portable collapsible travel kettle is dual voltage and can boil up to 500ml / 17.5oz of water, which is more than enough for making an AeroPress.
Just remember that you will need access to a power outlet for any electric travel kettle.

Further Reading
And that’s it for our review of the AeroPress and AeroPress Go! We also have a number of other relevant posts that we think you will find useful for travel planning.
- We have a detailed run down of our favourite portable coffee makers, in case you wanted some more options
- We have a guide to the best travel shoes for men, and the best travel shoes for women
- If you’re looking for packing tips, see our guides to what to pack for a ski trip, what to pack for Iceland, what to pack for London, and what to pack for winter in Finland to get started.
- For gift ideas, see our guide to what to buy for photographers, travel themed home decor items, and our ultimate gift guide for travelers.
- Just because you have your own travel coffee maker doesn’t mean you should skip out on trying great cafes when you travel. See our guide to the best cafes in Rome as a starting point.
- We also have lots of travel posts to help inspire and help you plan your next trip! These include our guide to the world’s best road trips, our guide to getting online when travelling, our guide to picking a travel router and more
- We have reviewed many other travel related products you might find useful. Check out our guide to the best travel routers, best travel cameras and best travel wraps to get started!
And that’s it! As always, we’re happy to hear your feedback and questions! Just pop them in the comments below, and we’ll get back to you as soon as we can.


More Stories
The Benefits of Fractional Ownership in Private Residence Clubs
Hotels in Bangalore – Accommodations For Everyone
What is a Flashpacker? 10 Traits That Separate Flashpackers From Backpackers